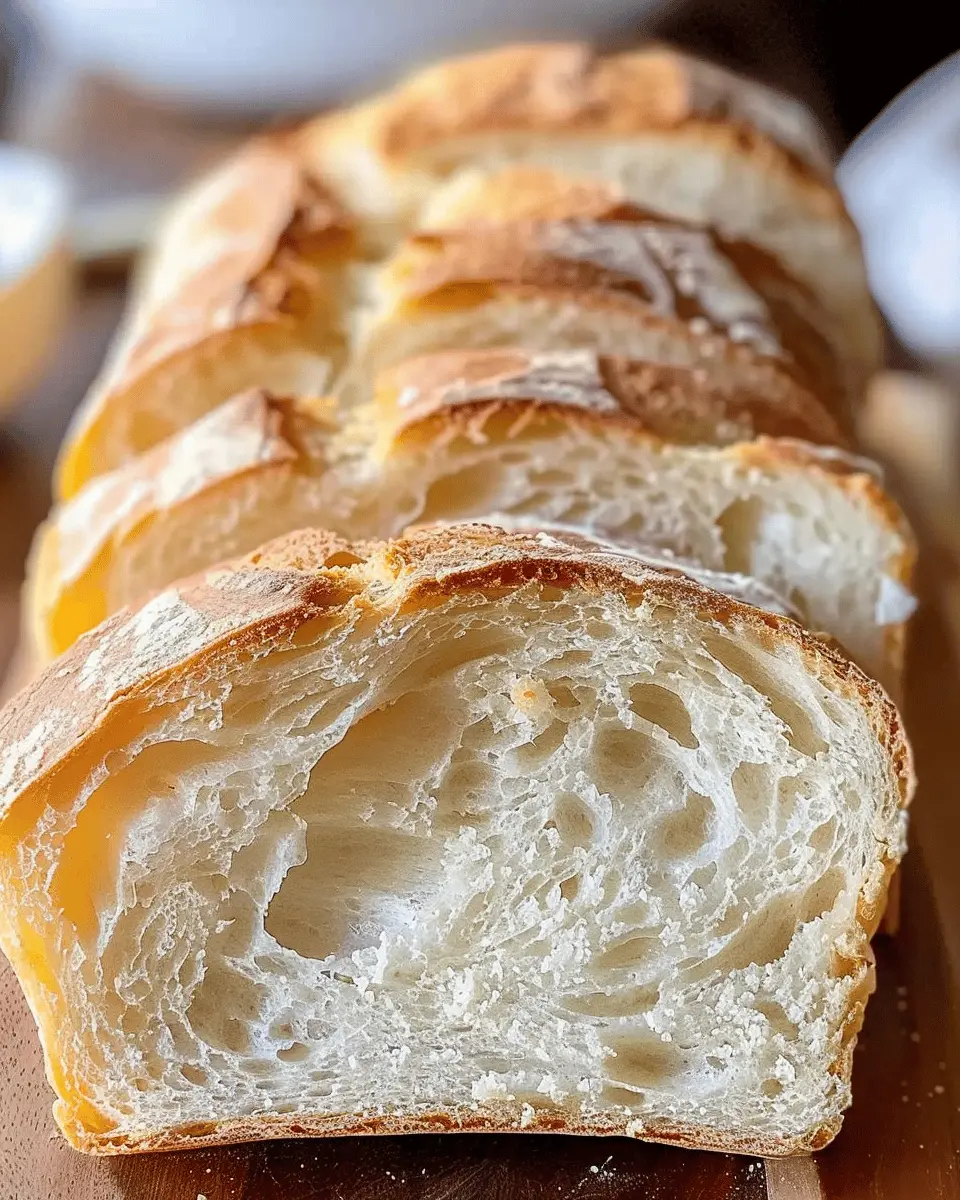
Introduction to Homemade White Bread
In a fast-paced world where busy professionals juggle multiple responsibilities, homemade white bread stands out as a delightful, practical solution for a wholesome meal. Imagine coming home after a long day and savoring the comforting aroma of freshly baked bread wafting through your kitchen. It’s not just about the taste; it’s about the experience of creating something nourishing and satisfying.
Why Homemade White Bread is a Game-Changer for Busy Professionals
For those of us navigating tight schedules—from early morning meetings to late evening deadlines—finding time to prep a nutritious meal can feel daunting. That’s where homemade white bread enters the scene.
-
Batch Preparation: Making a loaf of homemade white bread is surprisingly straightforward. With minimal ingredients and a little bit of time, you can prepare several loaves at once and freeze them. This means you’ll always have fresh, warm bread ready to complement your meals or create quick sandwiches with turkey bacon or even chicken ham.
-
Quality Control: One of the best aspects of creating your own bread is knowing precisely what goes into it. Unlike store-bought options that may contain preservatives or additives, your homemade bread only has the ingredients you choose. You can even experiment with whole wheat or other healthy variations to suit your dietary preferences and tastes.
-
Cost-Effective: Did you know that baking your own bread can save you money in the long run? While the initial investment in flour, yeast, and other ingredients is minimal, considering the rising costs of retail bread, making your own can be a budget-friendly alternative.
-
Customizable and Fun: Homemade white bread isn’t just about taste or nutrition; it’s also an enjoyable cooking project. You can tailor the recipe to your liking, add various herbs, or incorporate other flavors. Pull in friends or family for a bake-off session—it’s a great way to unwind and connect!
Want to dive deeper into the benefits of baking your own bread? Check out resources from Serious Eats and The Kitchn for expert tips and additional recipes. By embracing the art of homemade white bread, you not only simplify your weeknight dinners but also enjoy a rewarding culinary experience.

Ingredients for Homemade White Bread
Essential ingredients for that perfect loaf
Creating homemade white bread is a delightful experience, and having the right ingredients is crucial to achieving that golden, soft texture. Here’s what you’ll need:
- All-Purpose Flour: 5-6 cups provide the structure and chewiness we love.
- Warm Water: Approximately 2 cups, ideal for activating yeast without overheating it.
- Active Dry Yeast: 2.25 teaspoons, which helps your bread rise beautifully.
- Sugar: 2 tablespoons give a touch of sweetness and feed the yeast.
- Salt: 2 teaspoons, essential for flavor and controlling yeast activity.
- Butter: 4 tablespoons, melted, adding richness to the loaf.
Did you know that using high-quality flour can make a notable difference? It’s true! Flour can vary significantly in protein content, affecting bread texture.
Optional add-ins for flavor variations
Want to spice things up? Consider these optional ingredients to customize your homemade white bread:
- Herbs or Spices: A tablespoon of dried rosemary or garlic powder can enhance flavor.
- Seeds: Add flaxseeds or sesame seeds for a nutritious crunch.
- Cheese: Shredded cheddar makes for a savory twist.
- Nuts: Chopped walnuts or pecans can add texture and taste.
Experimenting with flavors is part of the fun! Your kitchen can become a playground for creativity. Plus, you’ll impress your friends and family with your personalized homemade white bread creations. Happy baking!
Preparing Homemade White Bread
Making homemade white bread is a rewarding experience that fills your kitchen with delightful aromas and provides you with a warm, comforting staple for your meals. Let’s break down this process into simple, manageable steps so you can impress your friends and family with your baking prowess.
Activating the yeast like a pro
The first step in making delicious homemade white bread is activating the yeast. This crucial step ensures that your bread rises beautifully. Start by combining warm water (about 110°F) with sugar. The sugar serves as a feast for the yeast! Sprinkle in the yeast, and let it sit for 5–10 minutes until it becomes frothy. This is essentially the yeast waking up and getting ready to work its magic.
Tip: If your mixture doesn’t froth, your yeast might be expired. Consider using this guide from King Arthur Baking to test the freshness of your yeast.
Mixing and combining dry ingredients
Once your yeast is active, it’s time to mix your dry ingredients. In a large mixing bowl, combine all-purpose flour, salt, and any other dried flavorings or spices you desire. For an even texture and flavor, whisk these ingredients together thoroughly.
- 4 cups all-purpose flour
- 2 teaspoons salt
The salt enhances the flavor but can inhibit yeast growth, so avoid mixing them directly—add salt to the flour mixture first before introducing the yeast.
Kneading the dough to achieve the right texture
Kneading dough may feel tricky at first, but it’s crucial for developing that beautiful texture in your homemade white bread. After combining your wet and dry ingredients, turn the dough out onto a floured surface. Knead for about 8–10 minutes until the dough is smooth and elastic. Picture this process as giving the dough a gentle workout—if your dough springs back when poked, you’re on the right track!
Pro Tip: If you’re short on time, a stand mixer with a dough hook can come to the rescue, saving those arm muscles!
The first rise—what to look for
After kneading, place your dough in a lightly greased bowl and cover it with a clean kitchen towel. Let it rise in a warm place for about 1 to 2 hours, or until doubled in size. A warming drawer or even a turned-off oven with a light on is perfect for this.
Watch for small bubbles forming and a slightly domed shape. This is your yeast doing its job, creating airy pockets for your bread.
Shaping and preparing for the final rise
Once the dough has risen, punch it down gently to release the air. Turn it out onto a floured surface, and now comes the fun part—shaping! Mold the dough into a loaf shape, ensuring even tension. Place it in a greased loaf pan, cover it again, and let it rise for another 30–45 minutes. You want it to be puffy but not overflowing.
The big bake—oven temperature tips
Finally, it’s time for the big bake! Preheat your oven to 375°F and place the loaf in the center. Bake for about 25–30 minutes, or until the bread is golden brown and sounds hollow when tapped on the bottom. If you have a kitchen thermometer, the internal temperature should reach around 190°F.
While baking, you might want to whip up a quick spread like herb-infused butter or perhaps a light garlic dip. Trust me, your homemade white bread will thank you!
Now that you have a step-by-step walk-through in preparing homemade white bread, it’s time to get started. This process not only feeds your body but can also serve as a mindful, therapeutic exercise. Enjoy every bite, and don’t forget to share your bakes and experiences online—there’s nothing quite like the satisfaction of homemade goodness! For additional tips and variations, check out resources such as Breadtopia. Happy baking!

Variations on Homemade White Bread
When it comes to homemade white bread, the possibilities don’t end with the basic recipe. Why not get creative? Here are a few delightful variations that can elevate your baking game.
Herb-infused white bread for an aromatic twist
Imagine slicing into a loaf of warm bread that releases the irresistible scents of rosemary, thyme, or basil. By incorporating fresh or dried herbs into your dough, you can create an herb-infused white bread that’s perfect for sandwiches or simply enjoying with a drizzle of olive oil. Here’s how:
- Add 1-2 tablespoons of your favorite herbs to the dry ingredients.
- If using fresh herbs, chop them finely and consider reducing the amount of flour slightly to keep a balanced dough.
For a detailed guide on herb usage in bread, visit The Bread Lab.
Whole grain white bread for a healthier option
If you’re in the mood for something healthier, why not blend whole grains with the classic white bread texture? Making whole grain white bread is a fantastic way to boost fiber and nutrients without sacrificing flavor.
- Substitute 25-50% of the all-purpose flour with white whole wheat flour.
- This variation retains a light texture while adding a nutty flavor.
Adding seeds like flax or chia will enhance both the nutritional value and texture. For more insights on whole grains, check out articles from Harvard Health.
Sweet white bread with a touch of cinnamon or honey
Sweeten up your homemade white bread with flavors that evoke comfort. A sprinkle of cinnamon or a splash of honey can transform your bread into a marvelous breakfast treat or a delightful afternoon snack.
- Mix 1-2 teaspoons of cinnamon into the dry ingredients.
- For a hint of sweetness, consider adding 2 tablespoons of honey or sugar during the mixing phase.
Drizzle it with butter or serve it with jam for a total delight.
Experimenting with these variations can turn an ordinary baking day into a culinary adventure. So, what’s stopping you from trying something new?
Cooking Tips and Notes for Homemade White Bread
When you embark on making homemade white bread, sometimes things don’t go as planned. Here are some troubleshooting tips:
Troubleshooting Common Baking Issues
- Dense Bread: If your loaf comes out heavy, double-check that your yeast is fresh. If it’s expired, it can result in a dense texture.
- Sinking Loaf: A loaf that collapses can indicate under-kneading. Ensure you knead until the dough is smooth and elastic.
Best Practices for Kneading and Rising
- Kneading: Use the “windowpane test” to see if your dough has been kneaded enough. Stretch a small piece—if it holds a thin membrane without tearing, you’re good to go! Check out King Arthur Baking for more tips.
- Rising: Choose a warm, draft-free location for your dough. Consider turning your oven on low briefly, then turning it off. Place the dough inside for a cozy rising environment.
By implementing these tips, your journey into making homemade white bread will be joyful and delicious! Remember to keep practicing; each loaf is a step toward mastery.

Serving Suggestions for Homemade White Bread
Tasty toppings and pairings for your fresh bread
When it comes to homemade white bread, the sky’s the limit in terms of toppings. Simple spreads can elevate your slice to new heights. Consider:
- Cream cheese and smoked salmon for a luxurious breakfast.
- Avocado and a sprinkle of sea salt for a trendy and wholesome snack.
- Nut butter with banana slices for a delightful post-workout treat.
If you’re in the mood for something sweet, a bit of honey or jam can complement the bread’s soft texture perfectly. You can find more pairing ideas on foodie blogs like The Kitchn or Food52.
Creative sandwich ideas using homemade white bread
Let’s face it—homemade white bread shines best when slathered with ingredients for the perfect sandwich. How about trying:
- Turkey bacon and avocado on toasted slices for a morning boost.
- Chicken ham and Swiss cheese with a touch of mustard for a satisfying lunch.
- Beef and cheddar with fresh spinach for a savory twist at dinner.
With these combinations, your fresh bread will not only bring comfort but also create delicious moments in your kitchen. Enjoy every bite!
Time Breakdown for Homemade White Bread
Making your own homemade white bread is a satisfying endeavor that doesn’t require a huge time commitment. Here’s a quick guide to help you plan your baking adventure!
Preparation Time
Typically, you’ll need about 20–30 minutes for preparation. This includes mixing the ingredients and kneading the dough. Grab your favorite mixing bowl and set up your ingredients! If you’re curious about the dough consistency, check out reliable sources like King Arthur Baking for tips on achieving the perfect texture.
Baking Time
Once your dough has risen, the baking phase takes approximately 25–30 minutes. You’ll want a golden crust, so keep an eye on that oven!
Total Time
In total, you’re looking at about 2–3 hours from start to finish, including rising time. Patience is key here, but the aroma that fills your home will be well worth it! If you’re planning a weekend family brunch or a cozy evening at home, making this homemade white bread is a fantastic way to impress your guests.
Nutritional Facts for Homemade White Bread
Caloric Content and Health Benefits
When you choose to make homemade white bread, you can enjoy a fresh and flavorful loaf with a surprising balance of nutrients. One slice typically contains around 80-100 calories, making it a satisfying addition to any meal. Unlike store-bought alternatives, homemade versions don’t include preservatives and artificial ingredients. Additionally, the process gives you the chance to incorporate whole grains or add seeds for extra fiber, enhancing heart health and digestion.
Breakdown of Key Nutrients
Understanding the nutritional makeup of your bread helps make informed choices. Here’s a quick overview of what you might find:
- Carbohydrates: Essential for energy, providing the necessary fuel for your daily activities.
- Protein: Contributes to muscle repair and growth. Enrich your bread with protein-rich flours for added benefits.
- Vitamins and Minerals: Homemade bread can be a good source of B vitamins and iron, particularly if you use enriched flour.
For further insights, check out the USDA Nutrition Data for detailed statistics about the ingredients you choose!
Making homemade white bread not only brings a wonderful aroma to your kitchen but also offers a mindful approach to what you eat. Wouldn’t you agree that enjoying fresh, healthy bread is worth the little extra effort?
FAQs about Homemade White Bread
How long does homemade white bread stay fresh?
When it comes to homemade white bread, freshness is key. Typically, fresh bread can remain delightful for about 2 to 3 days at room temperature. However, to keep that freshly baked flavor and texture, try to enjoy it as soon as possible! If you notice the bread developing a slightly hard crust, simply pop it in the microwave for about 10 seconds to bring back some softness.
Can I freeze homemade white bread?
Absolutely! Freezing is one of the best ways to preserve your homemade white bread. Make sure to slice the bread before freezing so you can take out only what you need. Wrap it tightly in plastic wrap or place it in a freezer-safe bag to keep out air and moisture. According to experts, properly stored, your bread can stay delicious for up to 3 months. Just thaw it at room temperature or toast the slices directly from the freezer for a hot, crispy treat.
What are the best ways to store homemade bread?
Storing your homemade white bread correctly can make all the difference. Here are a few effective methods:
- Room Temperature: Keep it in a breadbox or a cloth bag to maintain humidity and airflow while preventing it from drying out.
- Paper Bags: These can be great for short-term storage, especially if you enjoy a crusty exterior.
- Plastic Containers: For a longer shelf life, use airtight containers, but remember this may soften the crust.
For more tips on bread storage, consider checking King Arthur Baking. They offer a wealth of information on maintaining your baked goods.
With this handy FAQ, you’re all set to make the most out of your homemade white bread experience! Enjoy the process, and happy baking!
Conclusion on Homemade White Bread
Embracing the joy of baking fresh bread at home
Baking homemade white bread is not just about the delicious outcome; it’s about the journey! The process of kneading dough and watching it rise can be incredibly rewarding. In today’s fast-paced world, taking a moment to create something from scratch allows you to slow down and enjoy the simple pleasures in life.
Imagine the aroma wafting through your kitchen as you bake—there’s really nothing like it! Whether you enjoy it with turkey bacon, fresh avocado, or as a side for your favorite soup, homemade bread elevates any meal. So why not indulge yourself and explore this beautiful culinary craft? Your taste buds will thank you!
For more tips on enhancing your baking experience, consider checking out resources like King Arthur Baking or Breadtopia. Happy baking!
PrintHomemade White Bread: The Best Easy Recipe for Comforting Loaves

A delightful and easy recipe for homemade white bread that yields comforting loaves perfect for any occasion.
- Prep Time: 20 minutes
- Cook Time: 35 minutes
- Total Time: 1 hour 55 minutes
- Yield: 1 loaf 1x
- Category: Bread
- Method: Baking
- Cuisine: American
- Diet: Vegetarian
Ingredients
- 4 cups all-purpose flour
- 2 tablespoons sugar
- 2 teaspoons salt
- 1 tablespoon active dry yeast
- 1.5 cups warm water
- 2 tablespoons vegetable oil
Instructions
- In a large bowl, mix the warm water, sugar, and yeast. Let it sit for 5 minutes until it becomes frothy.
- Add flour, salt, and vegetable oil to the yeast mixture.
- Knead the dough for about 8-10 minutes until smooth.
- Place the dough in a greased bowl, cover it, and let it rise in a warm place for 1 hour or until doubled in size.
- Punch down the dough and shape it into a loaf.
- Place it in a greased loaf pan and let it rise again for about 30 minutes.
- Bake in a preheated oven at 350°F (175°C) for 30-35 minutes.
- Remove from the oven and let it cool before slicing.
Notes
- For a richer flavor, you can substitute half of the all-purpose flour with whole wheat flour.
- Ensure your water is not too hot, as it can kill the yeast.
Nutrition
- Serving Size: 1 slice
- Calories: 120
- Sugar: 0.5 g
- Sodium: 150 mg
- Fat: 3 g
- Saturated Fat: 0.5 g
- Unsaturated Fat: 2.5 g
- Trans Fat: 0 g
- Carbohydrates: 24 g
- Fiber: 1 g
- Protein: 4 g
- Cholesterol: 0 mg
Keywords: Homemade White Bread, easy bread recipe, comfort food