Introduction to DIY Lunchables with Cheese
For many of us, Lunchables are a delightful trip down memory lane. These pre-packaged, compartmentalized meals were a staple for kids, combining perfectly portioned crackers, cheese, and meats into a convenient snack. But as we venture into adulthood, we begin to crave the indulgence of our youth—minus the processed ingredients and added preservatives. That’s where our journey into the world of DIY Lunchables with Cheese begins!
Recreating Lunchables isn’t just about nostalgia; it’s also a brilliant way to embrace healthier eating habits while enjoying the playful aspect of assembling your own meals. With a few simple ingredients, you can create a satisfying and nutritious version that caters to your own taste preferences. According to a recent study by the American Journal of Clinical Nutrition, individuals who prepare their meals tend to consume healthier options compared to those who frequently eat out.
So why opt for homemade Lunchables? Not only do you get to customize your cheese selections—from sharp cheddar to creamy brie—but you can also include wholesome additions like fresh fruits, assorted nuts, and even turkey bacon or chicken ham for some added protein. It turns lunchtime into a fun, edible art project! Imagine spreading a tangy cheese on crispy crackers paired with juicy strawberries or apple slices. Delicious!
Why DIY Lunchables?
When preparing your own DIY Lunchables with Cheese, you have the freedom to explore flavors and textures that resonate with you. Here are some great options to include:
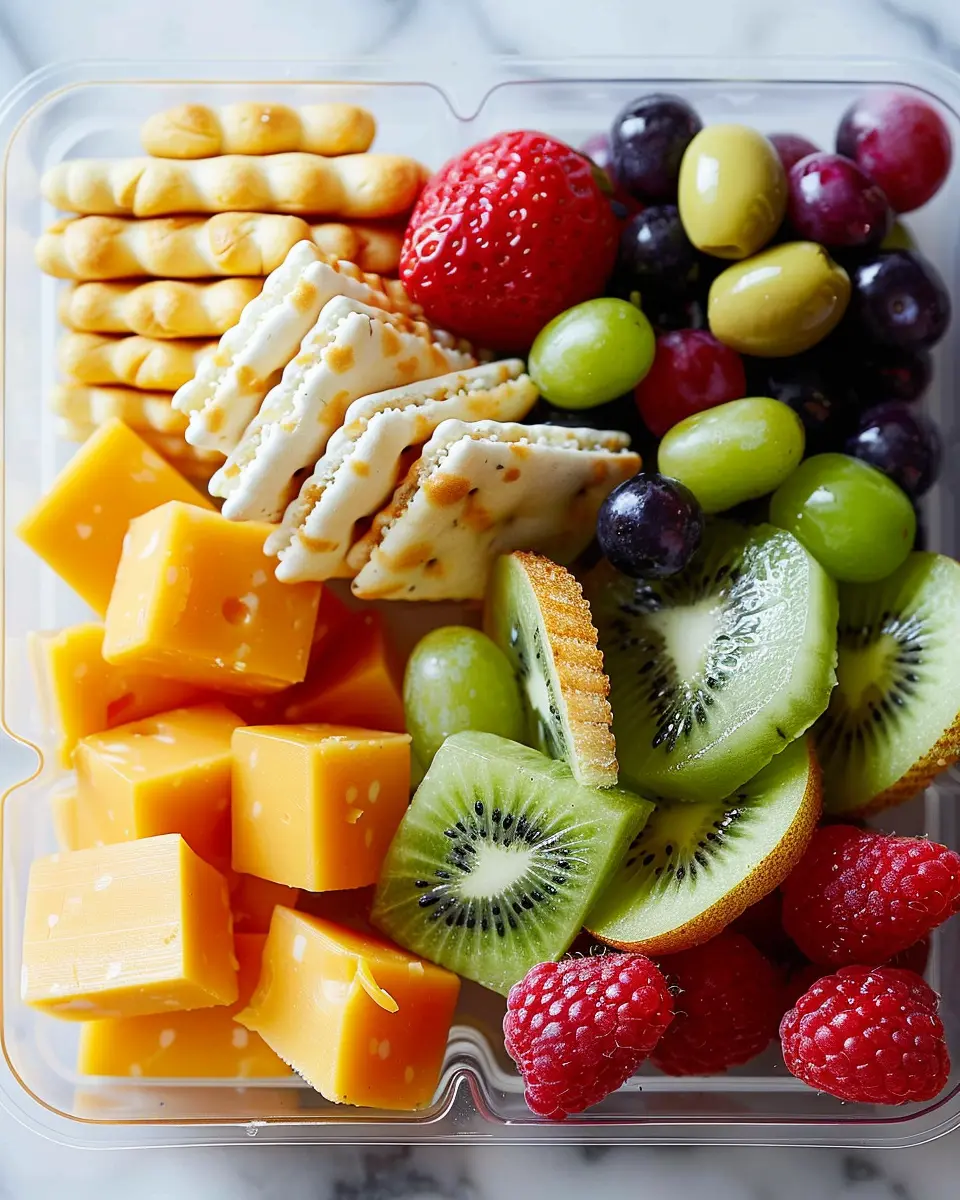
- Cheeses: Choose personal favorites like gouda, mozzarella, or a spicy pepper jack.
- Crackers: Opt for whole-grain varieties or even gluten-free options if you’re avoiding gluten.
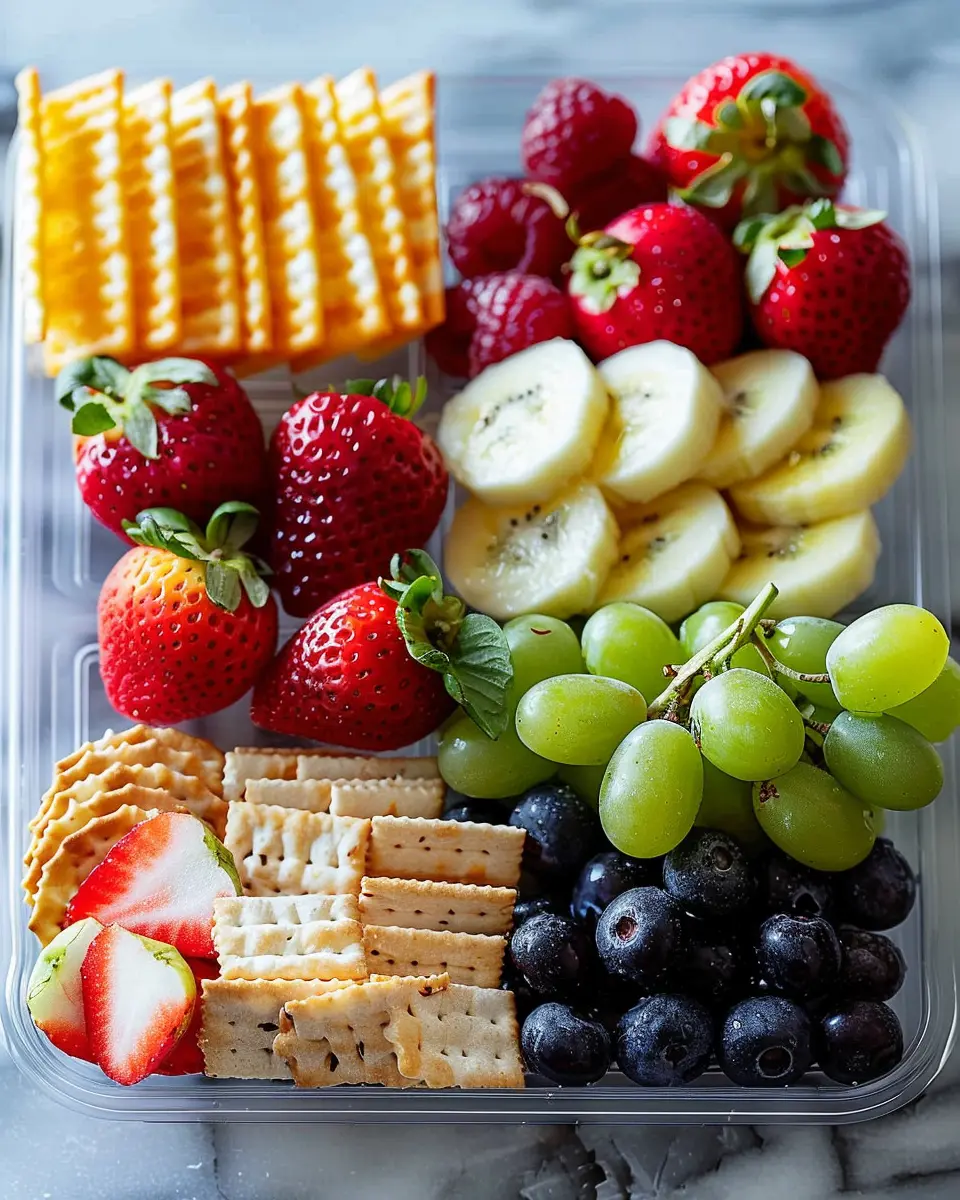
- Fruits: Fresh berries, apple slices, and grapes make for vibrant, refreshing choices.
- Proteins: Don’t forget the turkey bacon or chicken ham to pack a protein punch.
Not only are these homemade delights more nutritious, but they also save you money in the long run. Interested in learning more about building a balanced meal? Check out resources from the U.S. Department of Agriculture for helpful tips on portion sizes and food groups.
So grab your favorite containers and let’s dive into making our very own DIY Lunchables with Cheese, Crackers, and Fruit! Your taste buds will thank you.
Ingredients for DIY Lunchables with Cheese
Creating your own DIY Lunchables with Cheese transforms lunchtime into a delightful experience, both for kids and adults. Let’s gather what you need for this fun and customizable meal!
Essential Ingredients
-
Variety of Cheese: Go for sliced cheese such as cheddar, mozzarella, or gouda. Mixing textures and flavors adds excitement to your lunch.
-
Crackers: Choose a selection, like whole grain, flavored, or gluten-free options. The crunch complements the creaminess of the cheese perfectly.
-
Fruits: Seasonal fruits like apple slices, grapes, or strawberries offer a refreshing sweetness. Not only do they taste great, but they also add valuable nutrients.
-
Protein: Include options like turkey bacon or chicken ham. These protein-rich additions keep you full and satisfied throughout the day.
-
Dips: Don’t forget about dips! Individual servings of hummus, salsa, or a light ranch dressing can take your DIY Lunchables with Cheese to the next level.
Putting It All Together
As you prepare, think about colors and variety to keep things visually appealing. Not only is it fun to eat, but it can also spark creativity in your meal prep! For more tips on balanced lunches, check out WebMD’s Nutrition page. Happy DIY-ing!
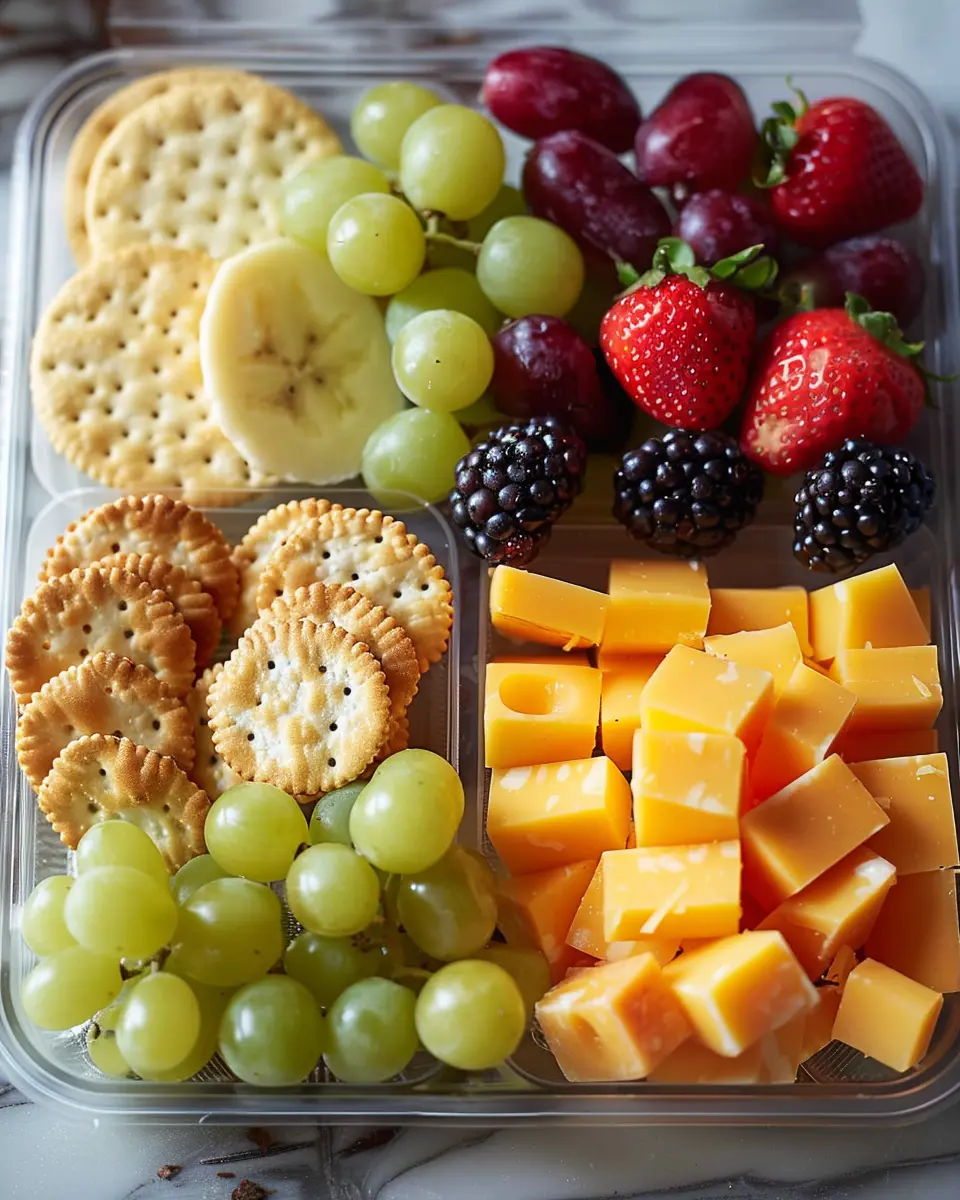
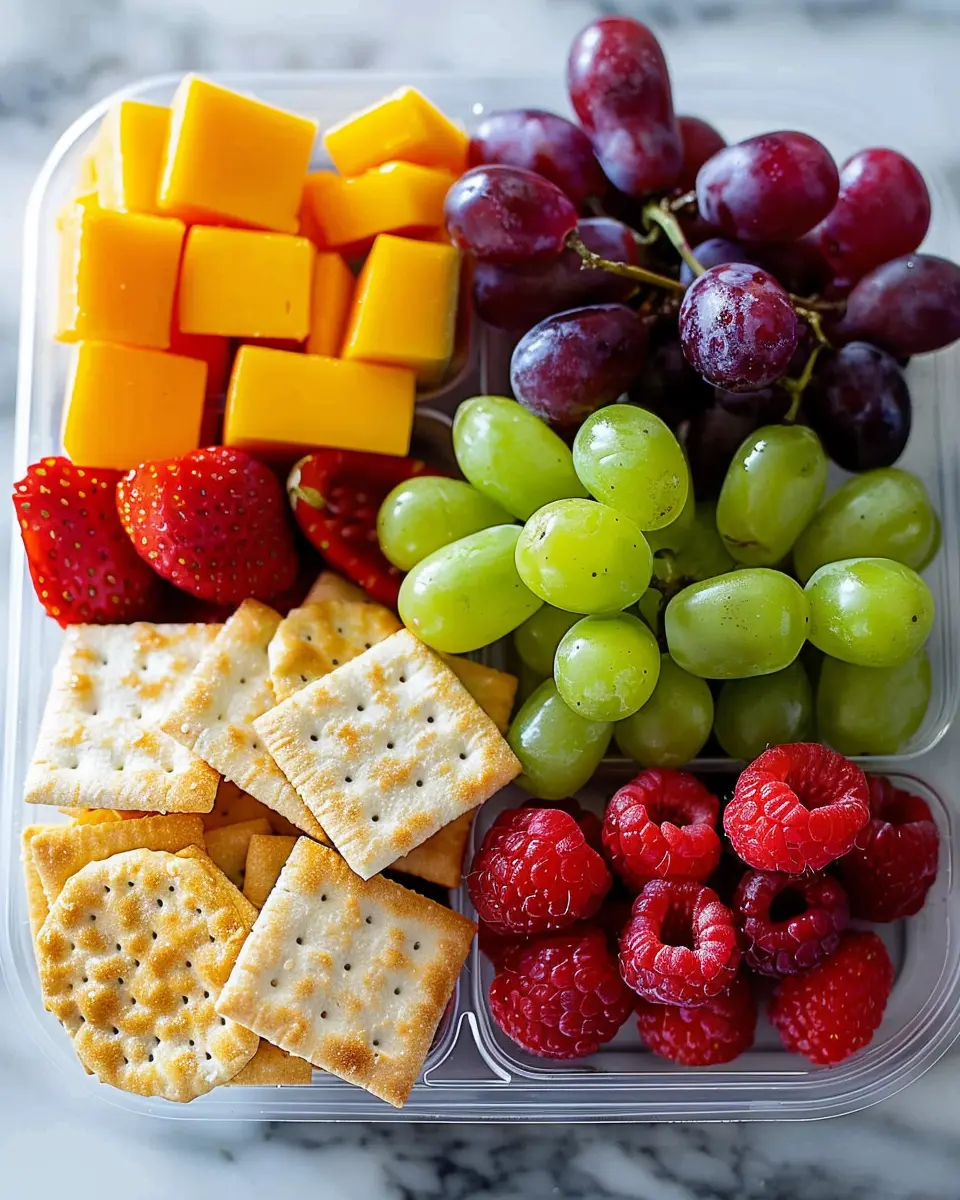
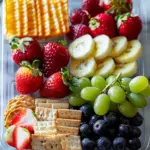
Preparing DIY Lunchables with Cheese
When it comes to tasty, convenient lunches that scream nostalgia, DIY Lunchables with Cheese, Crackers, and Fruits hit the sweet spot. Whether you’re packing a lunch for work or looking for a fun, nutritious option for your kids, these homemade delights are customizable, satisfying, and easy to prepare. Let’s dive into how you can create your own delightful Lunchables right at home.
Gather your ingredients
First things first—head to your kitchen and gather everything you’ll need. The beauty of DIY Lunchables is flexibility, so feel free to mix and match based on your preferences. Here’s a suggested list to get you started:
-
Cheese (opt for a mix of hard cheeses like cheddar, gouda, or even a creamy brie)
-
Crackers (whole grain, gluten-free, or classic saltines all work great)
-
Meats (Chicken ham, turkey bacon, or even salami)
-
Fresh fruits (think strawberries, grapes, apple slices, or any seasonal picks)
-
Dips (yogurt, hummus, or even a tangy mustard)
While this combination works well, don’t hesitate to let your creativity shine! You can find more inspiration at sites like Cooking Light.
Organizing your lunchbox or bento box
Next up, it’s time to pick out a suitable container. A lunchbox or a bento box with multiple compartments is ideal for keeping your ingredients separate. This not only helps maintain freshness but also keeps the delightful visual appeal intact.
Consider the following tips for organizing:
- Use dividers: If your container doesn’t have compartments, you can utilize silicone baking cups to give each food group its own space.
- Layer wisely: Place heavier items at the bottom and lighter items, like fruits, on top to prevent squishing.
- Don’t overpack: Allow some space for movement but still make everything snug enough to not jostle around.
Packing the cheese and crackers
Now to the fun part: packing your cheese and crackers. Start with a generous serving of cheese. Aim for about 1-2 ounces per person, which is a good balance, especially if you’re also adding other proteins like chicken ham or turkey bacon.
- Slice the cheese: Pre-sliced cheese is great for convenience but can be pricey. Try slicing blocks of cheese at home for a fresher taste and more control over thickness.
- Choose your crackers: Go for a mix of textures—crunchy, buttery, or even seeded crackers to add variety to each bite.
- Pair wisely: Consider pairing flavors—sharp cheddar with salty crackers, or creamy brie with whole grain for something extra special.
Adding the fresh fruits
Fruits are a fantastic addition not only for their vibrant look but also for nutritional value. Aim for a quarter of your box to be filled with fresh fruits.
To enhance your DIY Lunchables with Cheese experience, try these tips:
- Cut them right: If you’re adding apple slices, sprinkle them with a bit of lemon juice to keep them from browning.
- Stick to bite-sized: Diced strawberries, grapes, or even mini clementines are easy to eat and won’t make a mess.
- Balance flavors: Sweet fruits can contrast beautifully with savory cheese, making each bite delightful.
Storing and transporting your DIY Lunchables
Once everything is packed in nicely, you’ll want to ensure your lunch stays fresh until you’re ready to eat. Here are some storage tips to keep your DIY Lunchables with Cheese as delicious as ever:
- Use ice packs: If you’re packing these for a day out or work, include an ice pack in your lunch bag to keep the cheese and meats chilled.
- Seal it up: Make sure your container is airtight—this helps maintain the flavor and texture of each item.
- Plan ahead: Prepare your Lunchables the night before, so you can just grab and go in the morning!
With just a few simple steps, you can create a delicious and nutritious lunch that’s sure to satisfy your midday cravings. So go ahead, get creative, and make your own DIY Lunchables with Cheese!
Variations on DIY Lunchables with Cheese
Crafting your DIY Lunchables with Cheese can be an enjoyable way to mix up snack time and make it more exciting. Let’s explore some unique twists that can elevate your homemade snack plates.
Unique cheese options
While cheddar and mozzarella are classics, don’t shy away from trying flavorful alternatives that can add a fun twist to your Lunchables. Consider incorporating:
- Gouda: This semi-soft cheese offers a nutty flavor that pairs well with fruits.
- Brie: Soft and creamy, Brie can elevate your snack with a touch of elegance.
- Pepper Jack: For a little kick, pepper jack cheese delivers spicy notes that create an exciting contrast with milder foods.
You can learn more about various cheese types at Cheese.com.
Alternative cracker choices
Getting creative with your crackers can completely change the vibe of your DIY Lunchables with Cheese. Instead of traditional options, you might like to try:
- Seeded crackers: These add crunch and nutritional value.
- Rice cakes: A lighter option that can be topped with cheese and toppings.
- Pita chips: Perfect for dipping and pairing with cheese spreads.
Consider checking out some great recipes for homemade crackers at Smitten Kitchen.
Additional fruit pairings
Don’t forget about the fruit! Adding different fruits can enhance flavor profiles and bring freshness to your DIY Lunchables with Cheese. Some delightful combinations include:
- Grapes or sliced apples with sharp cheddar: A classic combo that never disappoints.
- Berries (strawberries, blueberries, raspberries) with Brie: The creaminess of Brie pairs perfectly with the tartness of berries.
- Dried fruits like apricots or figs with Gouda: They add a sweet and chewy contrast to the savory cheese.
Experimenting with these variations will not only satisfy your taste buds but also keep your daily lunches fun and varied!
Cooking Tips and Notes for DIY Lunchables with Cheese
Keeping everything fresh until lunchtime
When crafting your DIY Lunchables with Cheese, freshness is key. To keep your cheese and other ingredients fresh until lunchtime, consider using:
- Insulated containers: They will help maintain the right temperature.
- Ice packs: Including an ice pack can keep your lunch cool and safe to eat.
- Separate compartments: Utilize bento boxes with dividers to keep everything organized and avoid sogginess.
If possible, pack your DIY Lunchables the night before and store them in the fridge. This allows the flavors to meld and gives you a hassle-free morning.
Creative ways to present your Lunchables
Making your lunch visually appealing can turn an ordinary meal into something special. Here are some fun ideas:
- Color coordination: Use colorful fruits alongside your cheese and crackers to create a rainbow effect.
- Stack and display: Arrange cheese slices and crackers in neat stacks for an Instagram-ready look.
- Themed boxes: Make your DIY Lunchables with Cheese fit a specific theme, like a picnic or a movie night.
With these tips, your lunch will be not only delicious but also a pleasure to look at. For more ideas on healthy lunch options, check out resources like Healthline and EatingWell.
Serving Suggestions for DIY Lunchables with Cheese
Enjoying with sides
Your DIY Lunchables with Cheese can be elevated with the right sides. Think beyond the classic fruit pairing—here are some tasty additions:
- Veggie Sticks: Carrots, cucumbers, or bell peppers add crunch and freshness.
- Dips: A small container of hummus or ranch dressing can enhance the flavor experience.
- Nuts: A handful of almonds or walnuts provides a satisfying crunch and healthy fats.
These sides not only make your lunch more exciting but also contribute to a well-rounded meal. Remember, variety is the spice of life!
Perfect pairings for drinks
When enjoying your DIY Lunchables with Cheese, the right drink can make all the difference. Consider:
- Sparkling Water: The bubbles provide a refreshing contrast to the creamy cheese.
- Iced Tea: A lightly sweetened iced tea can enhance your meal’s flavors without overpowering them.
- Flavored Lemonade: Try strawberry or cucumber lemonade for a unique twist.
Choosing the right beverages can elevate your lunch experience. Pairing your meal thoughtfully transforms a simple outing into a delightful tasting adventure.
Time Breakdown for DIY Lunchables with Cheese
Preparation Time
Creating your DIY Lunchables with Cheese starts with an easy 10 minutes of prep. Gather your ingredients—sliced cheeses, crackers, fruits, and turkey bacon or chicken ham—along with any additional toppings you prefer. This is the perfect time to get creative!
Assembly Time
Next comes the 5 minutes of assembly. Arrange your delicious ingredients in a fun, visually appealing way. They don’t just taste great; a colorful presentation can make your lunch feel special. Consider easy-to-find containers or bento boxes to make this process even simpler.
Total Time
All in all, your total time for these DIY Lunchables with Cheese is just 15 minutes! It’s an efficient way to prepare a balanced meal, perfect for your busy schedule. For more tips on efficient meal prep, you might find this meal planning guide helpful!
Nutritional Facts for DIY Lunchables with Cheese
Creating your own DIY Lunchables with Cheese is not only fun but also a great way to control your diet! Here’s a quick look at the nutritional stats:
Calories
A typical serving of your homemade DIY Lunchables with Cheese can be around 350-400 calories, depending on the portion sizes of cheese, crackers, and fruit you choose. It’s a satisfying snack that won’t weigh you down during the day.
Protein Content
You’ll find that cheese is a fantastic source of protein. A serving can offer approximately 10-15 grams of protein, especially if you opt for options like cheddar or mozzarella. Adding turkey bacon or a handful of nuts can enhance this even further, helping keep you energized!
Sugars and Vitamins
With the fruit included, expect to add a healthy dose of natural sugars along with vital vitamins. For example, berries bring in antioxidants and vitamin C, while dried fruits contribute fiber. It’s a delightful way to balance savory and sweet while fueling your body.
For more on the benefits of protein and fiber, you might check out resources like the American Dietetic Association or the USDA Nutrition Facts. They provide a wealth of information on how nutrients impact your daily energy levels.
By making DIY Lunchables with Cheese, you’re not just eating; you’re making smart choices that nourish your body and satisfy your cravings!
FAQs about DIY Lunchables with Cheese
Can I prepare these Lunchables a day in advance?
Absolutely! One of the best things about DIY Lunchables with Cheese is their convenience. You can assemble them a day ahead, making your mornings easier. Just be sure to store them in airtight containers in the refrigerator. This helps keep the ingredients fresh and prevents any cross-contamination of flavors. You might want to wait to add items like fruit until you’re ready to eat, as they can get a bit soggy over time.
How can I make it more filling?
If you’re looking to satisfy a bigger appetite, consider adding a protein boost.
Here are a few ideas:
- Turkey Bacon: A great alternative high in protein that’s both satisfying and tasty.
- Chicken Ham: A lean option that pairs well with cheese and crackers.
- Nuts or Seeds: Almonds, cashews, or pumpkin seeds can add crunch and nourishment.
These additions not only make the meal more fulfilling but also help keep your energy levels stable throughout the day.
What are some good side options to add?
Adding sides can elevate your DIY Lunchables with Cheese experience. Consider incorporating:
- Veggies: Baby carrots, cucumber slices, or bell pepper strips provide a refreshing crunch.
- Dip: A little container of hummus or ranch dressing can transform your veggies into a delightful treat.
- Yogurt: A small serving of Greek yogurt is not only delicious but also a great source of protein.
If you’re looking for inspiration on combinations, check out this healthy lunch ideas article that explores various options to keep your lunch exciting.
With these tips in mind, your DIY Lunchables will not only be fun to prepare, but they’ll also keep you satisfied and nourished throughout your busy day!
Conclusion on DIY Lunchables with Cheese
Creating DIY Lunchables with Cheese is a fantastic way to enjoy a healthy, customizable snack. Not only can you select your favorite ingredients, ensuring a nutritious balance, but you can also experiment with various flavors and textures. Homemade versions save you money and cut down on unnecessary additives.
By combining cheese, crackers, and fruits, you’re not just making a meal; you’re crafting a fun, portable option perfect for busy workdays or after-school snacks. So why not embrace the creativity? Dive into the world of DIY Lunchables, and let your taste buds dictate your choices!
For more insight into the nutritional benefits, check out resources like Harvard Health.
PrintDIY Lunchables with Cheese: Easy, Fun, and Delicious Meal Prep
Create your own delicious DIY Lunchables filled with cheese, crackers, and fruit for a fun meal prep idea.
- Prep Time: 10 minutes
- Total Time: 10 minutes
- Yield: 2 servings 1x
- Category: Lunch
- Method: No-Cook
- Cuisine: American
- Diet: Vegetarian
Ingredients
- 4 ounces cheese (cheddar, gouda, or your favorite)
- 8 crackers (any kind you like)
- 1 cup fresh fruit (grapes, apple slices, or berries)
- 1 tablespoon nuts (optional)
Instructions
- Start by cutting the cheese into small cubes or slices.
- Arrange the crackers on one side of your lunch container.
- Add the cheese next to the crackers.
- Include a section for the fresh fruit.
- If using, add the nuts for a crunchy element.
- Seal the container and store it in the refrigerator until ready to eat.
Notes
- Mix and match ingredients based on your preferences.
- Use whole grain crackers for a healthier option.
Nutrition
- Serving Size: 1 serving
- Calories: 300
- Sugar: 10g
- Sodium: 200mg
- Fat: 15g
- Saturated Fat: 7g
- Unsaturated Fat: 6g
- Trans Fat: 0g
- Carbohydrates: 30g
- Fiber: 2g
- Protein: 10g
- Cholesterol: 30mg
Keywords: DIY Lunchables, cheese, meal prep, easy recipes