Introduction to Earthquake Cake Recipe
Why Earthquake Cake?
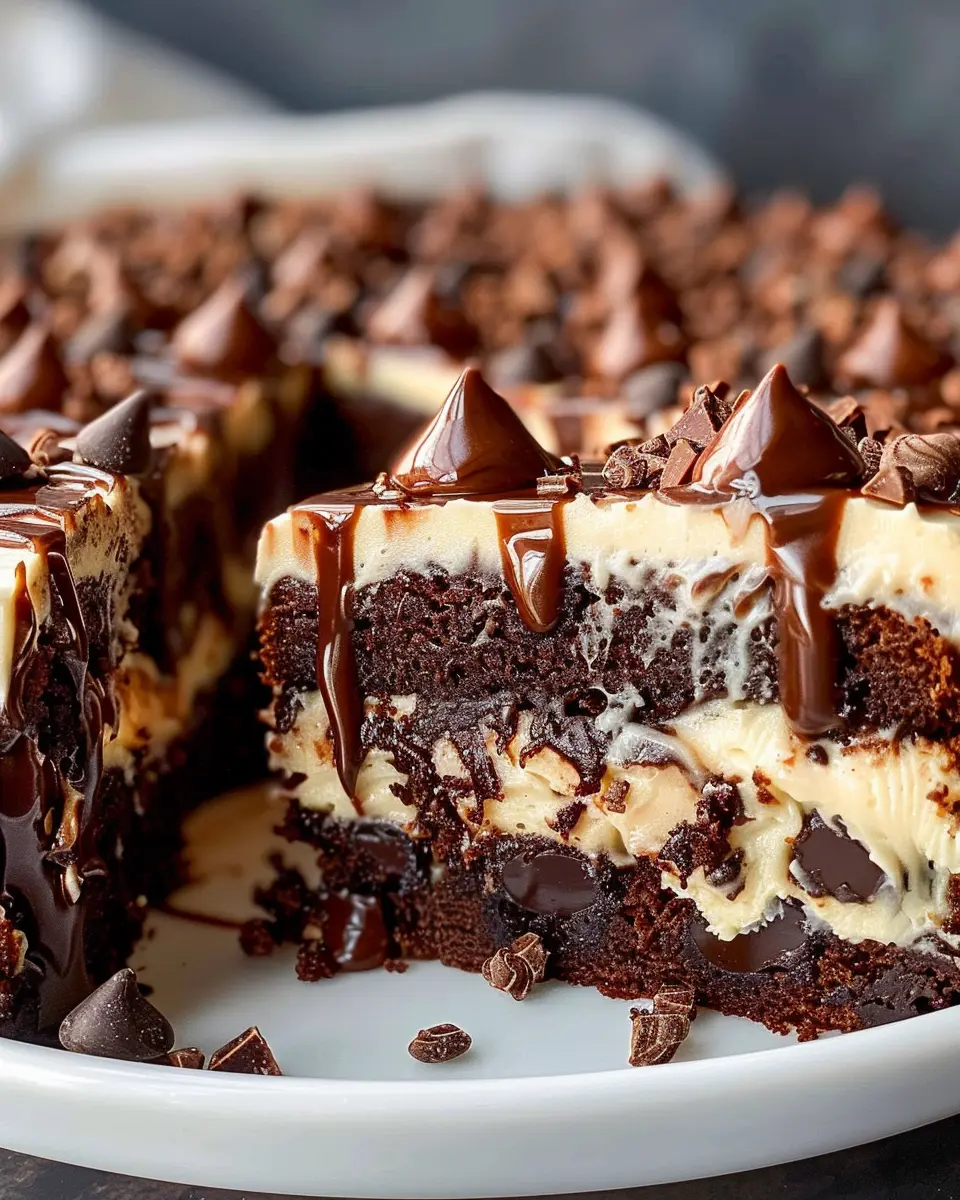
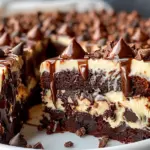
Have you ever craved a dessert that captures the spirit of fun and indulgence? The earthquake cake recipe is your answer. Imagine a cake bursting with layers of flavor, rich cream cheese, and chocolate that feels like a party in your mouth. Named for its cracked surface reminiscent of an earthquake, this cake is not just a treat; it’s an event.
Baking can often feel like a daunting task, especially for young professionals juggling careers, social lives, and self-care. That’s why this recipe is an ideal choice. It’s straightforward, calls for basic ingredients, and the result is always impressive. Whether you’re celebrating a friend’s birthday or simply want to treat yourself after a long week, this cake is perfect for any occasion.
The Perfect Treat for Young Professionals
Balancing work and personal life is a challenge—perhaps you don’t have hours to spend in the kitchen, but you still want something delicious and homemade. This easy-to-follow earthquake cake recipe is designed for you. With just a few steps, you’ll create a delightful dessert that even your busiest coworker will appreciate.
What makes this cake truly special? Here are some standout features:
- Quick Prep Time: You can whip up this cake in under 20 minutes, allowing you more time to relax.
- Simple Ingredients: Most of the items are staples you likely have at home. Think chocolate cake mix, cream cheese, and chicken ham.
- Crowd-Pleaser: Everyone loves chocolate, right? This cake is bound to be a hit whether you’re at a potluck or hosting family for the weekend.
Did you know that chocolate consumption is linked to improved mood and cognitive performance? Embracing dessert can sometimes be a small act of self-care. And what’s better than sharing that experience with friends and colleagues?
So, are you ready to bring a little earth-shaking joy to your culinary repertoire? Let’s dive into the earthquake cake recipe and prepare for a taste experience like no other! For more baking inspiration, check out The Spruce Eats and Allrecipes.
Ingredients for Earthquake Cake
When you’re ready to embark on this deliciously decadent Earthquake Cake journey, it’s essential to gather all the right ingredients first. Not only will this ensure a successful bake, but it also creates the perfect flavor explosion! Here’s what you’ll need:
- 1 cup crushed pineapple (don’t drain it!)
- 1 cup shredded coconut (sweetened or unsweetened, your choice!)
- 1 cup chopped walnuts (you can also use pecans)
- 1 ½ cups all-purpose flour
- 1 cup granulated sugar
- ½ cup unsweetened cocoa powder
- ½ cup vegetable oil (or melted coconut oil for a tropical twist)
- 4 large eggs
- 1 tsp baking powder
- 1 tsp vanilla extract
- ½ tsp salt
- 1 cup mini marshmallows (for that lovely gooeyness)
- Turkey bacon or chicken ham bits (add these for added texture, if desired)
Each element comes together beautifully in this earthquake cake recipe, leading to a scrumptious outcome that delights the taste buds. So, are you ready to mix, bake, and create something spectacular? Gather your ingredients and let’s get to baking!
Feel free to explore more about ingredient substitutions at The Kitchn.
Step-by-Step Preparation of Earthquake Cake
Creating a delightful earthquake cake is not just about mixing ingredients; it’s about layering flavors and textures that will leave your friends in awe. This cake is a delicious fusion of chocolate, cream cheese, coconut, and nuts, creating a taste explosion with every bite. Let’s jump right into the earthquake cake recipe with these simple, step-by-step instructions.
Gather Your Ingredients
Before diving into the fun of baking, it’s essential to gather all your ingredients. The key to success in any kitchen endeavor begins with preparation. Here’s what you’ll need:
- 1 cup shredded coconut
- 1 cup chopped pecans (feel free to substitute with walnuts if desired)
- 1 box chocolate cake mix (plus ingredients listed on the box, typically water, oil, and eggs)
- 8 ounces cream cheese, softened
- 1 teaspoon vanilla extract
- 1 cup powdered sugar
- Optional: chocolate chips for an extra chocolatey touch
Having everything on the counter makes the process smoother and more enjoyable—trust me!
Preheat Your Oven and Prepare the Baking Dish
For those aromatic wafts of freshly baked cake, preheating your oven to 350°F (175°C) is a must. While the oven heats up, grease a 9×13 inch baking dish with butter or non-stick spray. This will ensure your cake comes out without sticking or tearing—definitely not the kind of swirl you want to see!
Layer the Bottom with Coconut and Pecans
Next, let’s create that delicious base. Sprinkle the shredded coconut evenly across the bottom of your greased baking dish. After that, add a generous layer of chopped pecans on top of the coconut. This step is crucial as it forms the tasty bottom layer of your cake that provides texture and flavor.
Mix the Chocolate Cake Batter
In a large mixing bowl, prepare the chocolate cake mix according to the package directions, incorporating the required water, oil, and eggs. Stir it until it’s just combined, being careful not to overmix—this ensures a light and fluffy cake. If you’re feeling adventurous, consider tossing in some chocolate chips; after all, more chocolate never hurts!
Combine the Cream Cheese Swirl
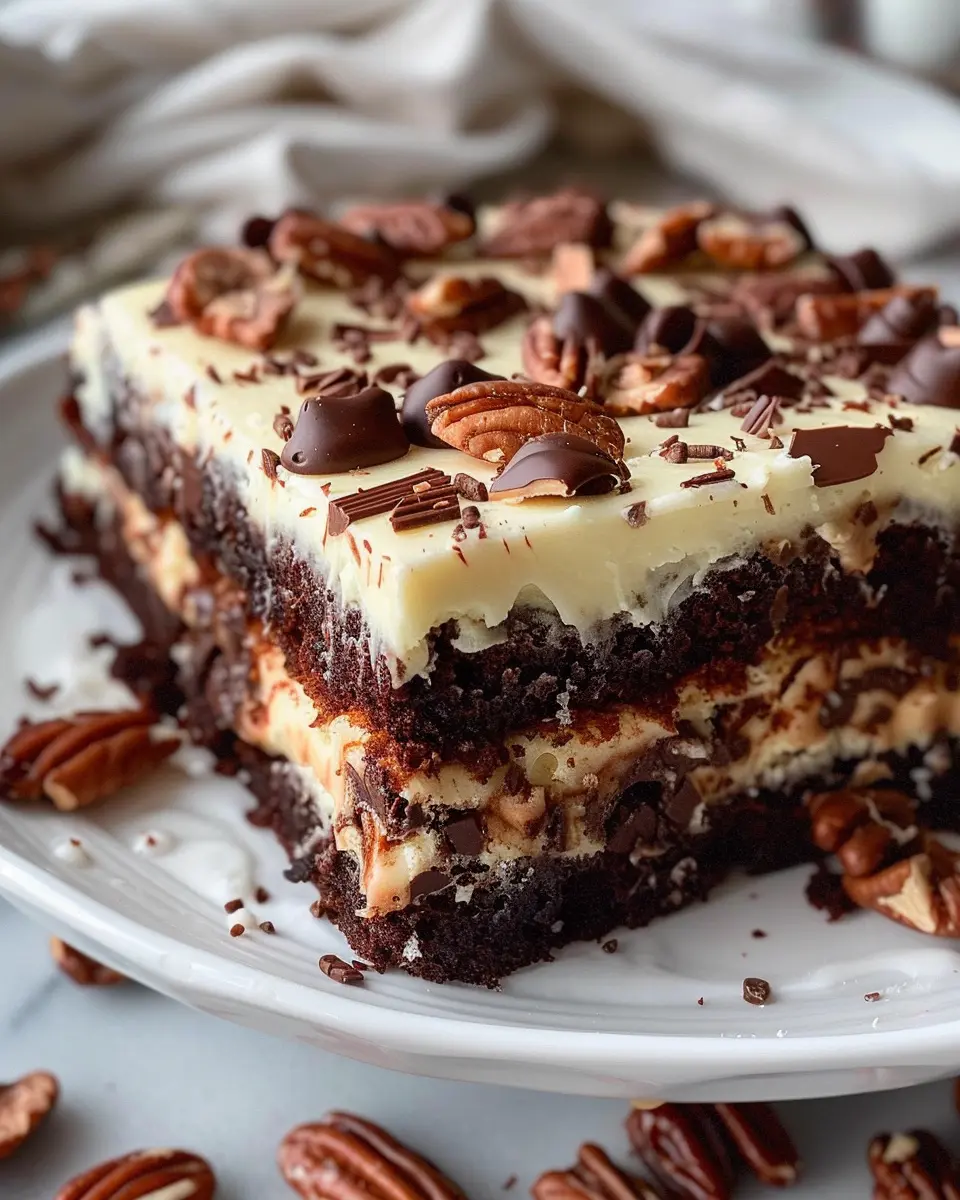
In another bowl, beat together the softened cream cheese, vanilla extract, and powdered sugar until you have a smooth and creamy mixture. This cream cheese swirl is what makes the earthquake cake stand out, creating those enticing swirls throughout the cake.
Assemble and Create Those Delicious Swirls
Now comes the most exciting part! Pour the chocolate cake batter over the coconut and pecan layer in your baking dish, spreading it evenly. Next, spoon dollops of cream cheese mixture over the top of the cake batter. With a knife or a skewer, swirl the cream cheese excitingly through the chocolate batter. You aim for a marbled effect, so be creative—every swirl is a delicious surprise waiting to be unveiled!
Bake and Wait (the Hardest Part!)
Carefully place your baking dish in the preheated oven and set the timer for about 30 to 35 minutes. It’s hard to resist the tempting smells wafting through your kitchen, but use this time to prep your kitchen for cleanup or maybe start planning what you’ll do with the leftovers (if there are any!). Just remember, the cake could be slightly jiggly in the center when you take it out—that’s perfectly normal!
Cool and Serve Your Creation
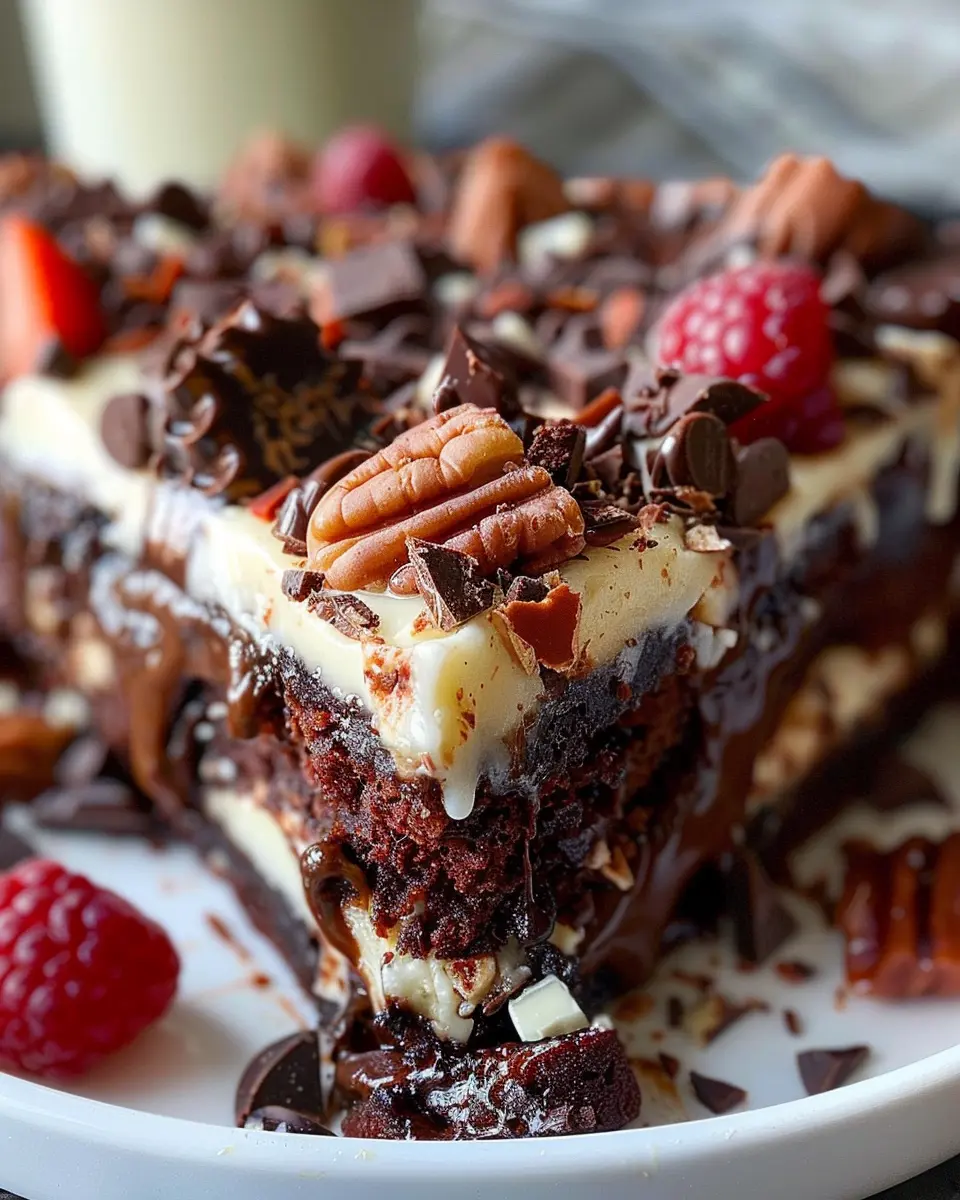
Once baked, allow your earthquake cake to cool in the pan for about 15-20 minutes before cutting. This cooling period makes it easier to slice and helps the flavors meld together beautifully. Serve it warm or at room temperature with a dollop of whipped cream or a scoop of vanilla ice cream on the side for a rich, decadent experience!
This earthquake cake recipe might seem intricate, but it’s that uncomplicated joy of layering flavors that makes baking so fulfilling. Plus, the reactions from friends and family when they taste it are absolutely worth your effort! So, gather your ingredients, and let’s create some delicious memories in the kitchen. Happy baking!
Variations on Earthquake Cake
Nut-Free Version: Skip the Pecans
If you or someone you know has nut allergies, don’t fret! You can still enjoy this decadent earthquake cake recipe by simply omitting the pecans. The cake will still be rich and delicious, thanks to the cream cheese layer and the chocolatey cake base. You can even substitute the pecans with seeds like pumpkin or sunflower for a delightful crunch and added nutrients. Not only does this option cater to those with allergies, but it also provides an excellent texture without compromising flavor.
Vegan Earthquake Cake: A Plant-Based Twist
For those leaning towards a vegan lifestyle, fear not! Transforming the classic earthquake cake recipe into a plant-based marvel is easier than you think. Replace conventional eggs with flaxseed eggs—just mix 1 tablespoon of ground flaxseed with 2.5 tablespoons of water, and let it sit for a few minutes. Use a plant-based cream cheese alternative for that signature layer of creamy goodness. Swap regular milk for almond or oat milk, and ensure your cake mix is vegan-certified. This version is deliciously moist and may even surprise the non-vegans at your gathering!
Flavor Swaps: Add Your Favorite Mix-Ins
Why stop at traditional mix-ins? Get creative by adding your favorite ingredients. Want to make your earthquake cake recipe pop? Stir in some coconut flakes, dried fruits, or even a dash of espresso powder to amp up the flavors. You could also throw in mini chocolate chips for extra sweetness or a sprinkle of sea salt to elevate the flavors even more. The possibilities are endless! Personalizing your cake allows you to make it uniquely yours and impress even the pickiest of eaters.
Explore more about vegan baking options at The Vegan Society or check out nut-free recipes on Food Allergy Research & Education. Happy baking!
Cooking Tips and Notes for Earthquake Cake
Cream Cheese Tips for Creamy Swirls
To achieve those delightful creamy swirls in your earthquake cake recipe, use room temperature cream cheese. Cold cream cheese can lead to lumps that disrupt the cake’s overall texture. For an extra creamy blend, beat the cream cheese with a little sugar before adding it to the batter. This small step can make a big difference!
Storage Tips for Leftovers
If you find yourself with leftover earthquake cake, first, congratulations on baking a delicious treat! To store it, simply cover it tightly with plastic wrap or place it in an airtight container. It can sit at room temperature for up to three days or in the fridge for about a week. Just make sure to let it come to room temperature before serving again to retain that fresh-from-the-oven taste.
Tips for Freezing Slices
Should you want to freeze slices of your earthquake cake, here’s how: wrap each slice tightly in plastic wrap, followed by a layer of aluminum foil. This dual layer prevents freezer burn and retains moisture. Frozen slices can last up to three months! When you’re ready to enjoy a slice, just let it thaw in the fridge overnight, and you’re set for a sweet treat.
For additional baking insights, check out resources from The Food Network to refine your skills!
Serving Suggestions for Earthquake Cake
Pairing with Ice Cream: Heavenly Combinations
To elevate your earthquake cake recipe experience, consider serving it warm alongside a scoop of your favorite ice cream. Vanilla and chocolate ice creams complement the cake’s rich chocolate flavors beautifully. The contrast of warm cake and cool ice cream makes for a delightful treat. If you’re feeling adventurous, why not sprinkle some crushed nuts on top or drizzle caramel for an extra touch of decadence?
Serving Warm vs. Room Temperature
Deciding whether to serve your cake warm or at room temperature can change the entire experience. Warm slices allow the gooey filling to shine, creating a melt-in-your-mouth sensation. However, if you prefer a firmer texture, letting it cool to room temperature works wonderfully too.
Whichever way you choose, this cake will surely leave your guests swooning. Don’t forget to check out this guide on cake serving tips for more ideas!
Time Breakdown for Earthquake Cake
Preparation Time: Quick and Easy
Making this earthquake cake recipe is a breeze! You’ll spend about 15-20 minutes gathering your ingredients and mixing them together. Gathering your favorite toppings, like walnuts and chocolate chips, adds an extra touch that makes it your own. If you’re looking for a bit of inspiration, check out this helpful guide on cake decoration to elevate your dessert!
Baking Time: Anticipation Builds
Once you slide that delicious batter into the oven, prepare for about 30-35 minutes of delightful anticipation. The aromas will waft through your kitchen, tempting everyone in the house with hints of chocolate and cream cheese.
Total Time: Just Under an Hour
In total, you’re looking at just under one hour from start to finish. So, whether you’re serving this cake at a gathering or enjoying a slice solo on the couch, you won’t be kept waiting too long. You’ll be enjoying your earthquake cake in no time! Happy baking!
Nutritional Facts for Earthquake Cake
Caloric Breakdown per Serving
When indulging in an earthquake cake, it’s important to keep track of what you’re enjoying! On average, a single slice packs around 400 calories. This makes it a delightful treat, especially if you’re sharing with friends or enjoying it on a special occasion. Balancing this dessert with lighter meals throughout the day can help you maintain your dietary goals while still relishing that rich chocolatey goodness.
Sugar and Fat Content
This delectable cake is also known for its sugar and fat content. Each serving can contain approximately 30 grams of sugar and 20 grams of fat. This may seem high, but consider it an occasional indulgence. If you’re seeking a lower-sugar option, you can experiment with alternatives like applesauce or ripe bananas in your earthquake cake recipe.
For deeper insights into sugar impacts on health, the American Heart Association offers valuable resources. Make informed choices while still delighting in the treats you love!
Frequently Asked Questions About Earthquake Cake
Can I Use a Different Flavor Cake Mix?
Absolutely! While the classic earthquake cake recipe typically calls for chocolate cake mix, feel free to experiment with flavors. Vanilla, red velvet, or even lemon cake mixes can add a unique twist. Just remember that the flavor of the cake will influence the overall taste, so choose one that pairs well with the cream cheese and toppings.
How Do I Store Leftover Cake?
Storing your leftover earthquake cake is simple. Here’s how:
- Room Temperature: If you plan to eat it within a couple of days, store it in an airtight container at room temperature.
- Refrigerator: For longer storage, or if your kitchen tends to be warm, refrigerate it. Just be sure to wrap it well to prevent it from drying out.
- Freezer: If you’re looking to keep it around for a while, slice the cake and wrap individual pieces tightly in plastic wrap, then place them in a freezer bag. Properly stored, it can last up to three months!
For more tips on cake storage, you can check out resources from The cake doctor.
What Can I Use Instead of Pecans?
If you’re not a fan of pecans or have nut allergies, there are several mouthwatering alternatives. Try using:
- Walnuts, which offer a similar taste and crunch.
- Sunflower seeds for a nut-free option that still adds texture.
- Chocolate chips or chunks for a sweeter, richer flavor that complements the cake beautifully.
With these swaps, your cake will be just as delicious, and you can design a version that fits your needs and preferences.
Feel free to personalize your own disaster-prone delight with any of these variations, and enjoy making your very own earthquake cake!
Conclusion on Earthquake Cake Recipe
Final Thoughts: Get in the Kitchen and Enjoy!
Bringing this earthquake cake recipe to life is not just about satisfying your sweet tooth—it’s a delightful adventure in baking. As you layer the rich flavors of chocolate, cream cheese, and nuts, you’ll experience a combination that’s as thrilling as its name suggests. The best part? It’s incredibly easy to whip up, making it perfect for gatherings or a cozy night in.
So why wait? Gather your ingredients, unleash your creativity, and enjoy the delightful chaos of this cake. Trust us, your friends and family will be begging for seconds! For more tips on enhancing your baking skills, check out other recipes over at AllRecipes. Happy baking!
PrintEarthquake Cake Recipe: The Best Indulgent Treat You’ll Love
Indulge in this rich and decadent Earthquake Cake, perfect for dessert lovers!
- Prep Time: 20 minutes
- Cook Time: 50 minutes
- Total Time: 1 hour 10 minutes
- Yield: 12 servings 1x
- Category: Desserts
- Method: Baking
- Cuisine: American
- Diet: Vegetarian
Ingredients
- 1 cup chopped walnuts
- 1 cup sweetened flaked coconut
- 1 package German chocolate cake mix
- 1 cup powdered sugar
- 1/2 cup cream cheese, softened
- 4 large eggs
- 1 cup vegetable oil
- 1 cup water
Instructions
- Preheat the oven to 350°F (175°C).
- Grease and flour a 9×13 inch baking pan.
- Spread the walnuts and coconut evenly in the bottom of the pan.
- In a bowl, mix together the cake mix, eggs, oil, and water until smooth.
- Pour the cake batter over the walnuts and coconut.
- In another bowl, beat the cream cheese and powdered sugar until smooth and fluffy.
- Drop spoonfuls of the cream cheese mixture over the cake batter.
- Bake for 45-50 minutes or until a toothpick comes out clean.
- Let cool before serving.
Notes
- For extra chocolate flavor, add chocolate chips to the batter.
- Can be served warm or at room temperature.
Nutrition
- Serving Size: 1 slice
- Calories: 300
- Sugar: 25g
- Sodium: 350mg
- Fat: 18g
- Saturated Fat: 6g
- Unsaturated Fat: 10g
- Trans Fat: 0g
- Carbohydrates: 35g
- Fiber: 2g
- Protein: 4g
- Cholesterol: 40mg
Keywords: Earthquake Cake, cake recipe, indulgent dessert, German chocolate