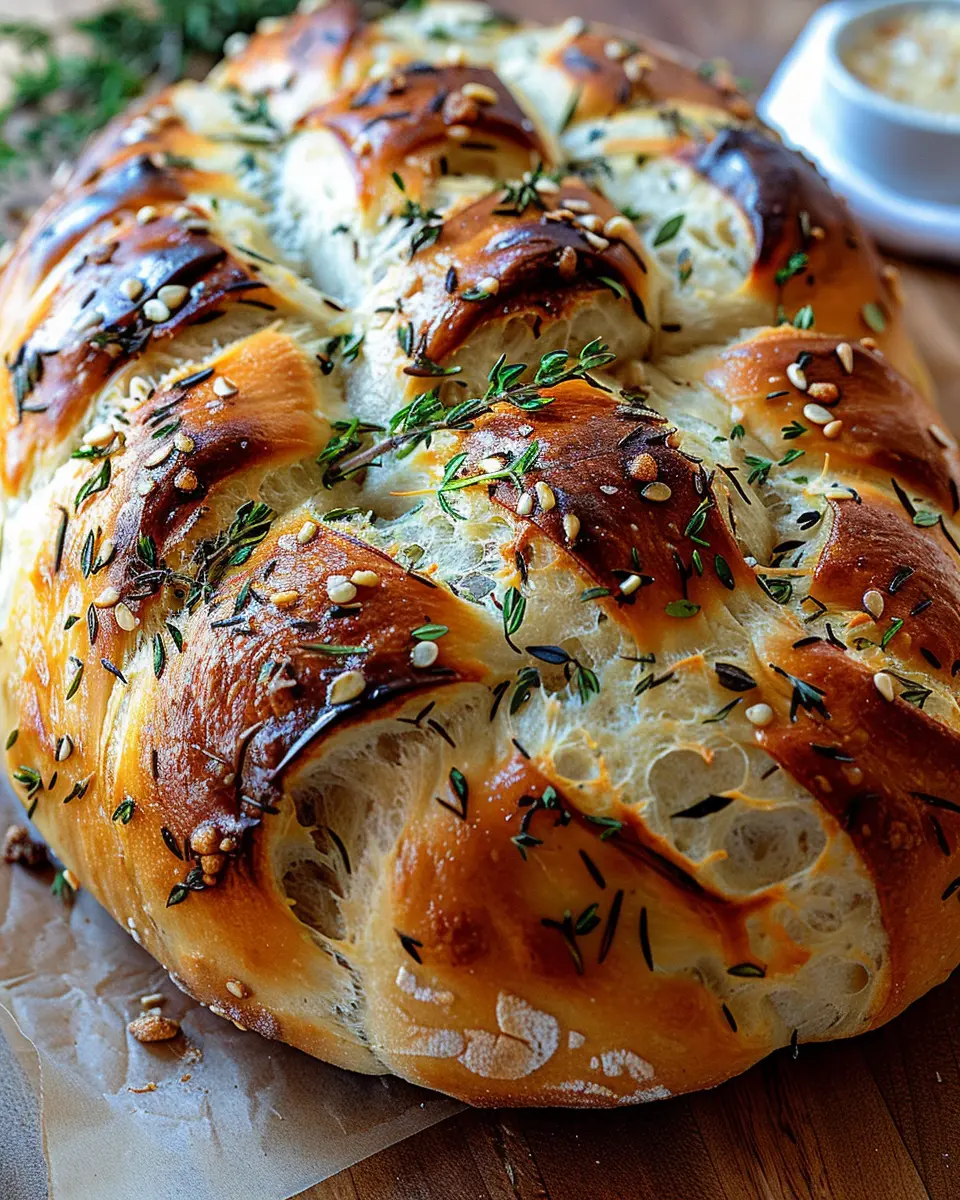
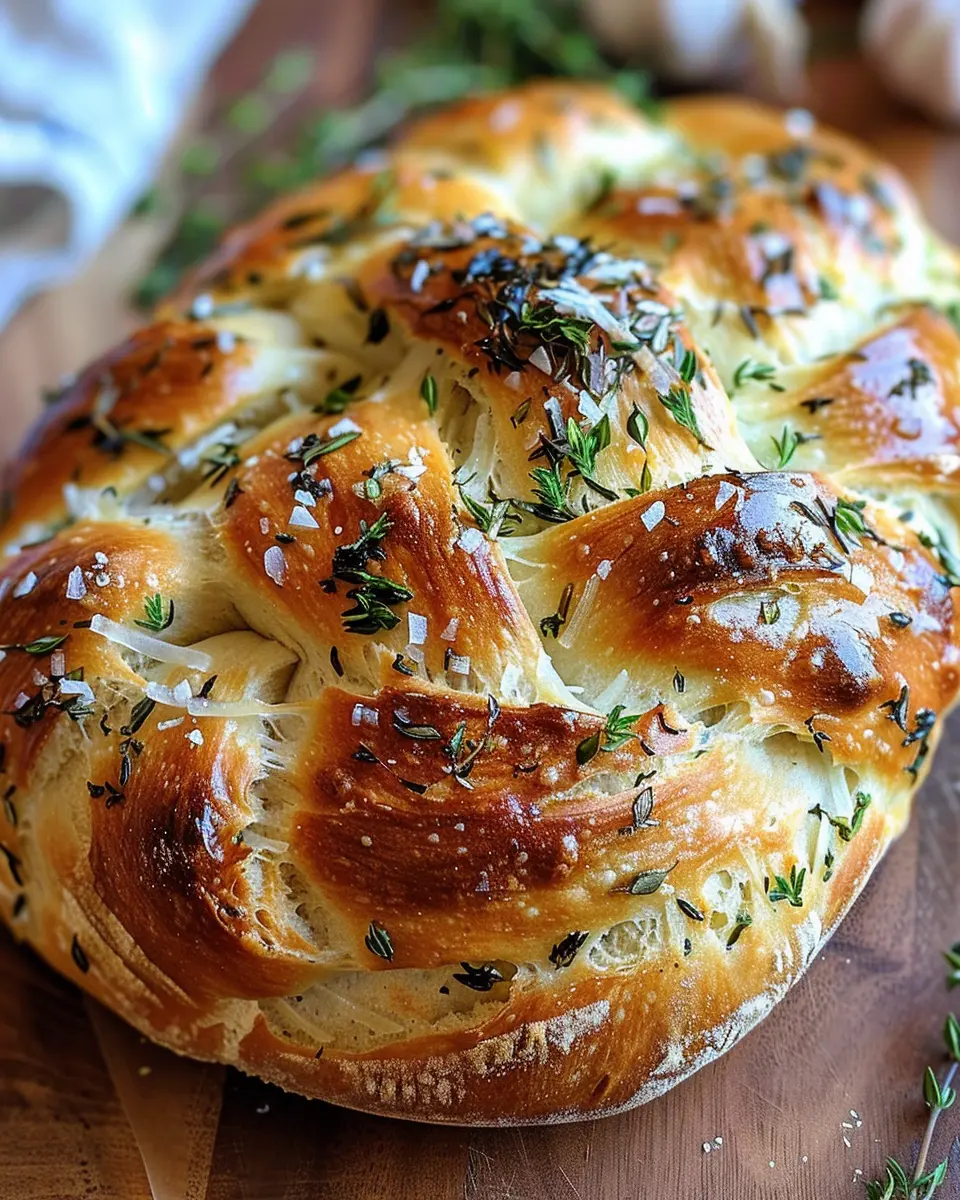
Why Bake Garlic Herb Braided Bread?
If you’re looking to brighten your kitchen with tantalizing aromas and welcome delightful flavors into your meals, then Garlic Herb Braided Bread might just become your new go-to homemade treat. Imagine the warmth of freshly baked bread, infused with the rich, savory notes of garlic and fragrant herbs—perfect as an accompaniment for soups, salads, or simply enjoyed on its own.
Culinary Versatility
One of the best things about this bread is its versatility. You can serve it at family dinners, impress guests during gatherings, or even enjoy it as a comforting snack after a long day. Picture yourself dip it into a vibrant marinara sauce or slathering it with creamy butter — it pairs beautifully with almost anything. Plus, it’s a fabulous conversation starter! After all, who doesn’t love the smell of garlic wafting through the air?
Health Benefits of Ingredients
The ingredients required are not only delicious but also provide some health benefits. Garlic, celebrated for its potential health benefits, may help boost your immune system and lower cholesterol levels, as noted in various studies about its medicinal properties (Healthline). Meanwhile, the fresh herbs you choose can introduce additional nutrients and flavors that enhance not just the dish but your overall health.
A Fun Baking Project
Baking Garlic Herb Braided Bread also serves as a wonderful bonding activity. Whether you involve friends or family, kneading the dough and twisting the braid can be a fun and fulfilling process. Plus, there’s something inherently rewarding about creating something delicious from scratch, right in your own kitchen.
So why not grab your apron and get started? The preparation might seem daunting at first, but once you get your hands in that dough, you’ll be proud every step of the way. And trust us, the taste will be worth every minute of your effort!
If you’re ready to dive into a comforting culinary adventure, this recipe will guide you through every twist and turn of making Garlic Herb Braided Bread. Happy baking!
Ingredients for Garlic Herb Braided Bread
When it comes to creating an irresistible Garlic Herb Braided Bread, the right ingredients make all the difference. This delightful bread is not only a feast for the senses but also a showstopper at any gathering. Here’s what you’ll need to whip up this delicious creation:
-
3 ½ cups all-purpose flour
The backbone of your bread, providing structure and texture. -
1 packet (2 ¼ teaspoons) active dry yeast
Essential for leavening, giving your bread that lovely rise. -
1 cup warm water (110°F)
Activates the yeast and helps the dough rise beautifully. -
2 tablespoons olive oil
Adds richness and enhances flavor. -
2 cloves garlic, minced
Infuses a warm, aromatic taste that’s simply irresistible. -
1 tablespoon fresh rosemary, chopped
A fragrant herb that brightens your bread. -
1 tablespoon fresh parsley, chopped
Adds a pop of color and fresh flavor. -
1 teaspoon salt
Essential for balancing flavors. -
1 tablespoon sugar
Feeds the yeast, ensuring a perfect rise.
Crafting your Garlic Herb Braided Bread with these simple ingredients will create a warm, comforting addition to any meal. Curious about the techniques? Check out expert tips for bread-making on sites like King Arthur Baking for extra insight!
Step-by-Step Preparation of Garlic Herb Braided Bread
Creating a homemade Garlic Herb Braided Bread is a delightful experience that fills your kitchen with wonderful aromas. Whether it’s for a cozy dinner or an impressive addition to a gathering, this recipe is perfect! Let’s dive into the preparation, step by step.
Activate the Yeast
The first step in making your Garlic Herb Braided Bread is to bring those yeast particles to life! In a bowl, combine:
- 1 cup of warm water (ideally about 110°F)
- 2 teaspoons of sugar
- 2 teaspoons of active dry yeast
Let this mixture sit for about 5 to 10 minutes, until it’s frothy. This bubbling indicates that your yeast is healthy and ready to work its magic. If your yeast doesn’t froth, it may be too old or the water too hot; it’s always a good idea to check the expiration date!
Mix the Dough
Once your yeast has activated, it’s time to mix the dough. In a large bowl, combine:
- 4 cups of all-purpose flour
- 1 teaspoon of salt
- 1 tablespoon of dried herbs (like oregano or basil)
- 2 tablespoons of minced garlic (fresh or roasted, depending on your preference)
After stirring the dry ingredients on their own, make a well in the center and pour in the yeast mixture along with 3 tablespoons of olive oil. Mix everything until it starts coming together into a shaggy dough. This is where the adventure begins — there’s nothing quite like watching those simple ingredients transform into something magical!
Knead to Perfection
Once your dough has formed, turn it out onto a floured surface. The next step is to knead your dough for about 6 to 8 minutes. Here’s how to do it:
- Fold the dough in half and push down with the ball of your hand.
- Rotate the dough a quarter turn and repeat.
You’ll know it’s ready when the dough is smooth and elastic. Kneading is not just exercise for your arms; it develops gluten, which gives the bread its delightful texture!
Let It Rise
After the dough is kneaded, place it in a large, greased bowl, cover it with a clean kitchen towel, and let it rise in a warm spot until it doubles in size—this usually takes about 1 hour. It’s a great time to take a break or prep your favorite spread!
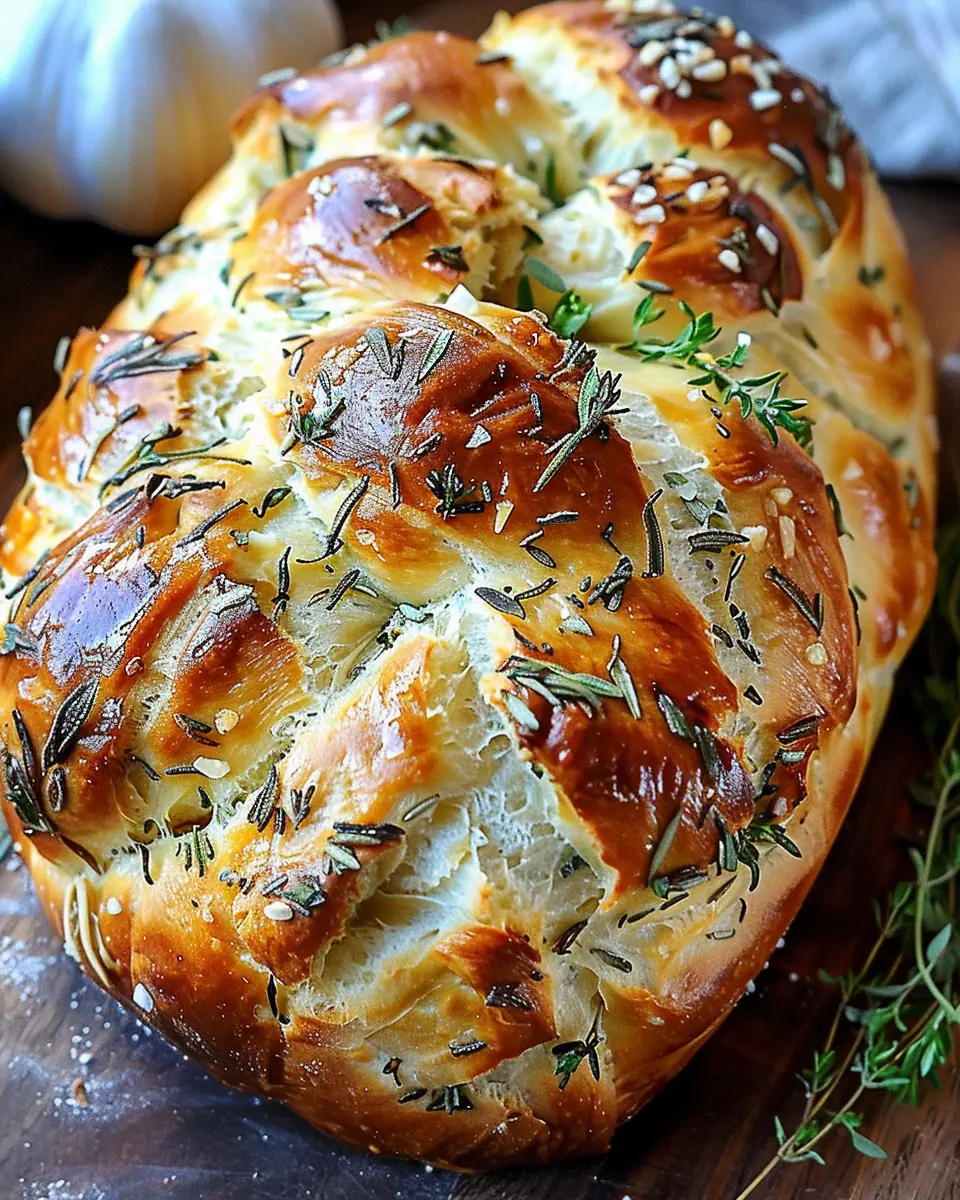
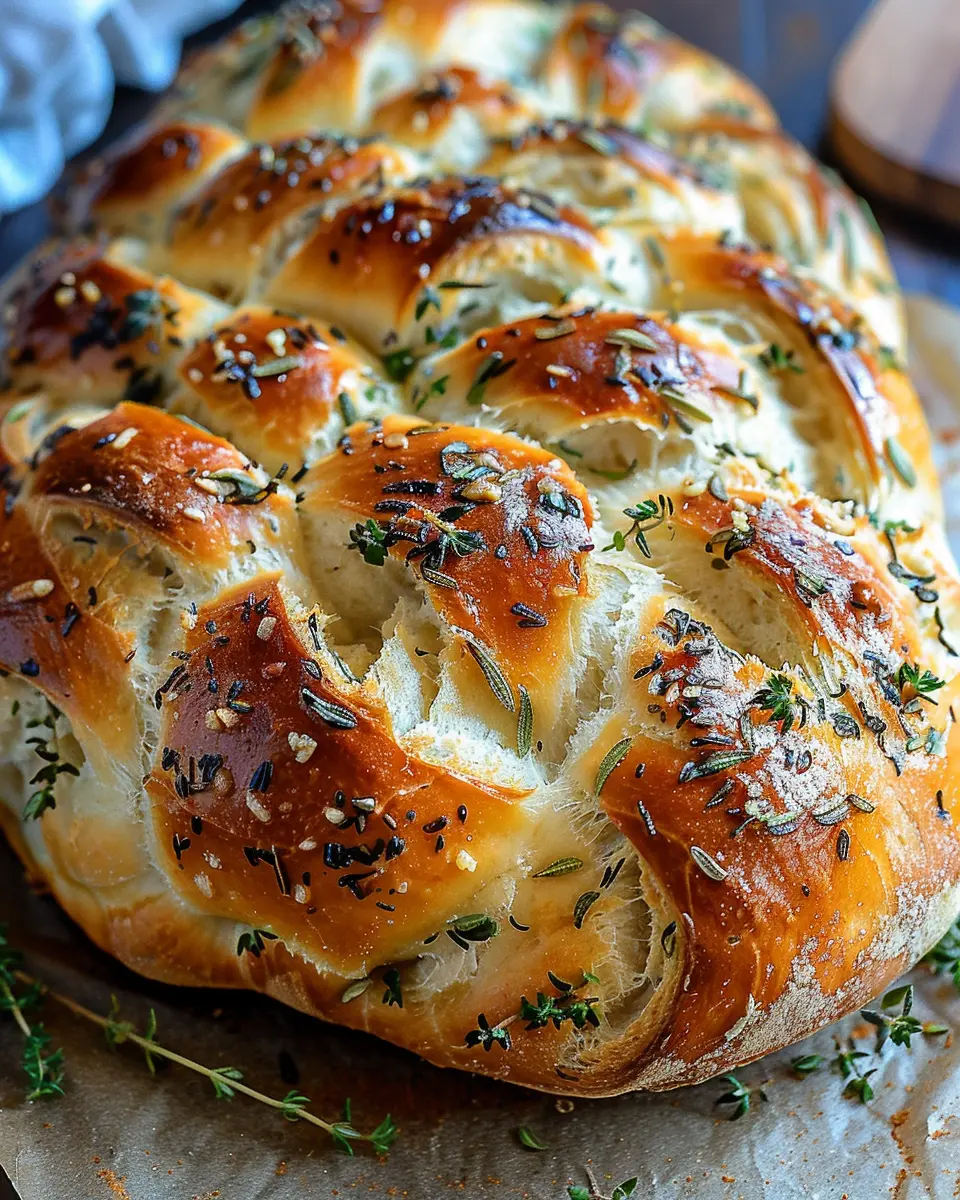
Shape and Braid the Loaf
Once risen, punch down the dough gently to release air bubbles and divide it into three equal pieces. Roll each piece into a long rope, about 12 inches in length. Now it’s time to braid:
- Pinch the tops of the ropes together.
- Cross the right rope over the middle, then the left over the new middle.
- Continue this until you reach the ends, then tuck them underneath.
Not only is braiding the dough a fun part of the process, but it also creates a beautiful presentation when baked.
Final Rise and Preheat
After shaping, allow the braided loaf to rise again for about 30 minutes on a parchment-lined baking sheet. While it rises, preheat your oven to 375°F. This second rise helps the bread become even fluffier!
Bake the Bread
Finally, it’s time to bake! Place your loaf in the preheated oven and bake for about 25-30 minutes, or until it turns a lovely golden brown. The aroma of Garlic Herb Braided Bread will fill your home and leave your guests hungry! If you want a crispy crust, brush the top with an egg wash before baking.
And there you have it—a step-by-step guide to creating your own Garlic Herb Braided Bread. Trust me, once you try this recipe, you’ll find yourself making it time and again; it’s not just bread, it’s an experience. Don’t forget to share with friends and family or slather in your favorite spread!
If you’re looking for variations to try, consider experimenting with different herbs or adding cheese to the mix. Happy baking!
Variations on Garlic Herb Braided Bread
Adding Cheese to the Mix
Cheese lovers, rejoice! You can easily elevate your Garlic Herb Braided Bread by incorporating your favorite cheeses into the dough. Imagine a warm, gooey blend of mozzarella and parmesan tucked inside the braids—delicious, right? For a tangy twist, consider adding crumbled feta or goat cheese, which pairs perfectly with the rich garlic flavor.
Don’t shy away from trying different combinations. A sharp cheddar will lend a robust taste, while a creamy havarti can add a silky texture. Just remember to balance the saltiness of the cheese with your herbs for that perfect flavor profile!
Herb Variations for a Unique Flavor
Want to customize your Garlic Herb Braided Bread even further? Mix up your herbs for a unique taste experience. While classics like rosemary and thyme are fantastic, why not explore herbs like dill or tarragon? These herbs can infuse your bread with a fresh, aromatic quality that’s sure to impress your friends at that next dinner party.
Consider blending herbs for even richer flavor—think basil and parsley or oregano and chives. A great resource for herb pairings is The Herb Society of America, where you can explore creative combinations and even discover the best herbs for various cuisines.
A Personal Touch
Have you ever thrown in a pinch of cinnamon for a slightly sweet version? It’s little tweaks like these that make each batch of your Garlic Herb Braided Bread truly unique. Embrace the experimentation, and don’t hesitate to share your results—your friends will definitely want in on the recipe!
Cooking Tips and Important Notes
When you’re making Garlic Herb Braided Bread, a few helpful tips can elevate your baking game. First, ensure your yeast is fresh; a quick test with warm water and a bit of sugar can reignite it. Perfect fermentation is crucial for that delightful rise!
- Let the dough rest: Patience is key in baking. Allow your dough to double in size during the initial rise—this step adds wonderful texture.
- Kneading technique: Aim for a smooth and elastic dough by kneading it for about 8-10 minutes. This develops gluten, essential for that chewy quality.
- Flavor it up: Experiment with herbs! While we’re sticking with garlic, adding rosemary or thyme can enhance the flavor profile.
- Storage tips: Wrap your Garlic Herb Braided Bread in plastic wrap once cooled to keep it fresh longer, or freeze it for future cravings.
- Pairing suggestions: This bread goes perfectly with a savory turkey bacon or chicken ham sandwich.
For more tips on bread-making, check out King Arthur Baking for expert advice! Happy baking!
Serving Suggestions for Garlic Herb Braided Bread
The delightful Garlic Herb Braided Bread isn’t just a standalone dish; it pairs beautifully with numerous meals and flavors. Here are some helpful serving suggestions to elevate your dining experience.
Pairing with Mains
- Savory Proteins: This bread pairs exceptionally well with turkey bacon or chicken ham. The herbs in the bread complement the savory notes of these meats, making a delightful sandwich.
- Flavorful Dips: Serve your bread with a side of garlic-infused olive oil or a tangy balsamic vinegar. Dipping can turn a simple meal into a gourmet experience.
Ideal for Gatherings
- Appetizer Delight: Consider slicing the Garlic Herb Braided Bread into smaller pieces for a crowd-pleasing appetizer. It’s perfect for gatherings, especially when paired with cheeses and cured meats like beef salami.
- Comfort Food: Whether it’s a cozy family dinner or a festive holiday feast, this bread fits right in, bringing warmth and comfort to the table.
Creative Takes
- Breakfast Twist: Use this bread for a hearty breakfast by stuffing it with eggs, cheese, and your favorite veggies.
Ready to make some unforgettable meals with your Garlic Herb Braided Bread? If you’re looking for more inspiration, check out Taste of Home for additional techniques and recipes!
Time Breakdown for Garlic Herb Braided Bread
Preparation Time
Getting started with your Garlic Herb Braided Bread is a breeze! You’ll want to set aside about 15 to 20 minutes to gather your ingredients and knead the dough. It’s the perfect time to let your favorite playlist play while you mix, knead, and get your hands a little floury.
Rising Time
Patience is key here! After you’ve shaped your dough, give it a cozy 1 to 1.5 hours to rise until it doubles in size. This is when you can plan your next meal, sip some herbal tea, or dive into a quick Netflix episode.
Baking Time
Once your dough has risen to perfection, it usually takes about 25 to 30 minutes to bake at a warm, toasty temperature. The mouthwatering aroma of garlic and herbs will fill your kitchen, making it hard not to sneak a taste!
Total Time
In summary, you’re looking at roughly 2 to 2.5 hours from start to finish. Factor in some fun chit-chat with a friend while you wait for the dough to rise, and you’re bound to enjoy the process even more! Happy baking!
For more baking tips and ideas, check out sources like King Arthur Baking or Serious Eats.
Nutritional Facts for Garlic Herb Braided Bread
Calories and Macronutrients
When you indulge in homemade Garlic Herb Braided Bread, you’re treating yourself to a delightful blend of flavors without sacrificing nutrition. Each serving contains approximately 150-200 calories, depending on the portion size. This delicious bread is composed predominantly of carbohydrates, which provide energy for your day. You’ll also find a moderate amount of protein, around 4-5 grams, thanks to the bread’s wheat content. Keep in mind that the addition of herbs and garlic not only enhances the taste but also offers numerous health benefits.
Micro-nutrients
Beyond calories and macronutrients, Garlic Herb Braided Bread packs a punch with essential vitamins and minerals. Ingredients like garlic are known for their immune-boosting properties, while the herbs contribute antioxidants that may reduce inflammation. You can also expect to find:
- Vitamin B6: Important for brain health and metabolism
- Manganese: Aids in bone formation and metabolism
- Selenium: Supports thyroid function and has antioxidant benefits
For more in-depth nutritional insights, feel free to check out the USDA’s FoodData Central.
Incorporating Garlic Herb Braided Bread into your meals can elevate not only flavor but also health. So why not whip up a batch and enjoy the benefits of fresh ingredients? It’s perfect for sharing with friends or family, making any meal feel extra special!
FAQs about Garlic Herb Braided Bread
Can I use whole wheat flour instead?
Absolutely! You can substitute whole wheat flour for all-purpose flour in your Garlic Herb Braided Bread recipe. Just keep in mind that whole wheat flour absorbs more moisture, so you might need to add a bit more water or yeast to keep the bread light and fluffy. If you’ve not baked with whole wheat before, I recommend starting with a 50-50 blend of whole wheat and all-purpose flour to achieve a balance of flavor and texture.
How can I store leftover bread?
To keep your Garlic Herb Braided Bread fresh, wrap it tightly in plastic wrap or aluminum foil and store it at room temperature. It’ll last for about 2-3 days. If you notice your bread drying out, you can always revitalize it by sprinkling a bit of water on it and popping it in a warm oven for a few minutes!
For more information on bread storage, check out resources like the Bread Alliance.
Is it possible to freeze garlic herb bread?
Yes, freezing is a great option! If you have leftover Garlic Herb Braided Bread, wrap it tightly in plastic wrap, followed by a layer of aluminum foil. This will help minimize freezer burn. When you’re ready to enjoy it again, simply remove it from the freezer and let it thaw at room temperature. For best results, reheat it in the oven for a few minutes to bring back that fresh-baked flavor.
Don’t hesitate to try different variations of this recipe! Whether you use herbs from your garden or experiment with different fillings, this bread is versatile and forgiving. Happy baking!
Conclusion on Garlic Herb Braided Bread
In summary, making Garlic Herb Braided Bread is not only a delightful culinary adventure but also a perfect way to impress your friends at your next get-together. The fragrant blend of herbs and garlic makes every bite a flavorful experience. Plus, the braid gives it an aesthetic charm that can elevate your dining table.
Consider pairing this bread with a nice bowl of homemade soup or a fresh salad for a complete meal. Have you tried experimenting with additional fillings like turkey bacon or chicken ham? The possibilities are endless! For more baking ideas, check out this guide to elevate your bread-making skills. Enjoy baking!
PrintGarlic Herb Braided Bread: Easy Recipe for Homemade Delight
Learn how to make delicious and easy Garlic Herb Braided Bread at home.
- Prep Time: 15 minutes
- Cook Time: 30 minutes
- Total Time: 90 minutes
- Yield: 1 loaf 1x
- Category: Bread
- Method: Baking
- Cuisine: Italian
- Diet: Vegetarian
Ingredients
- 2 cups all-purpose flour
- 1 tablespoon active dry yeast
- 3/4 cup warm water
- 1 tablespoon sugar
- 1 teaspoon salt
- 2 tablespoons olive oil
- 2 cloves garlic, minced
- 1 tablespoon fresh herbs (such as rosemary or thyme)
Instructions
- In a bowl, combine warm water, sugar, and yeast; let it sit until foamy.
- In a large mixing bowl, combine flour and salt.
- Add the yeast mixture and olive oil to the flour, then knead until smooth.
- Let the dough rise in a warm place until doubled in size, about 1 hour.
- Once risen, punch down the dough and incorporate minced garlic and herbs.
- Divide the dough into three equal parts and roll into strands.
- Braid the strands together and place on a baking sheet.
- Let it rise again for about 30 minutes.
- Bake at 375°F (190°C) for 25–30 minutes until golden brown.
Notes
- For extra flavor, brush melted butter over the bread after baking.
- Experiment with different herbs for varied tastes.
Nutrition
- Serving Size: 1 slice
- Calories: 150
- Sugar: 1g
- Sodium: 200mg
- Fat: 4g
- Saturated Fat: 0.5g
- Unsaturated Fat: 3g
- Trans Fat: 0g
- Carbohydrates: 27g
- Fiber: 1g
- Protein: 4g
- Cholesterol: 0mg
Keywords: Garlic, Herb, Braided, Bread, Homemade, Easy Recipe