Introduction to No-Oven Turkish Bread
The Appeal of Homemade Bread
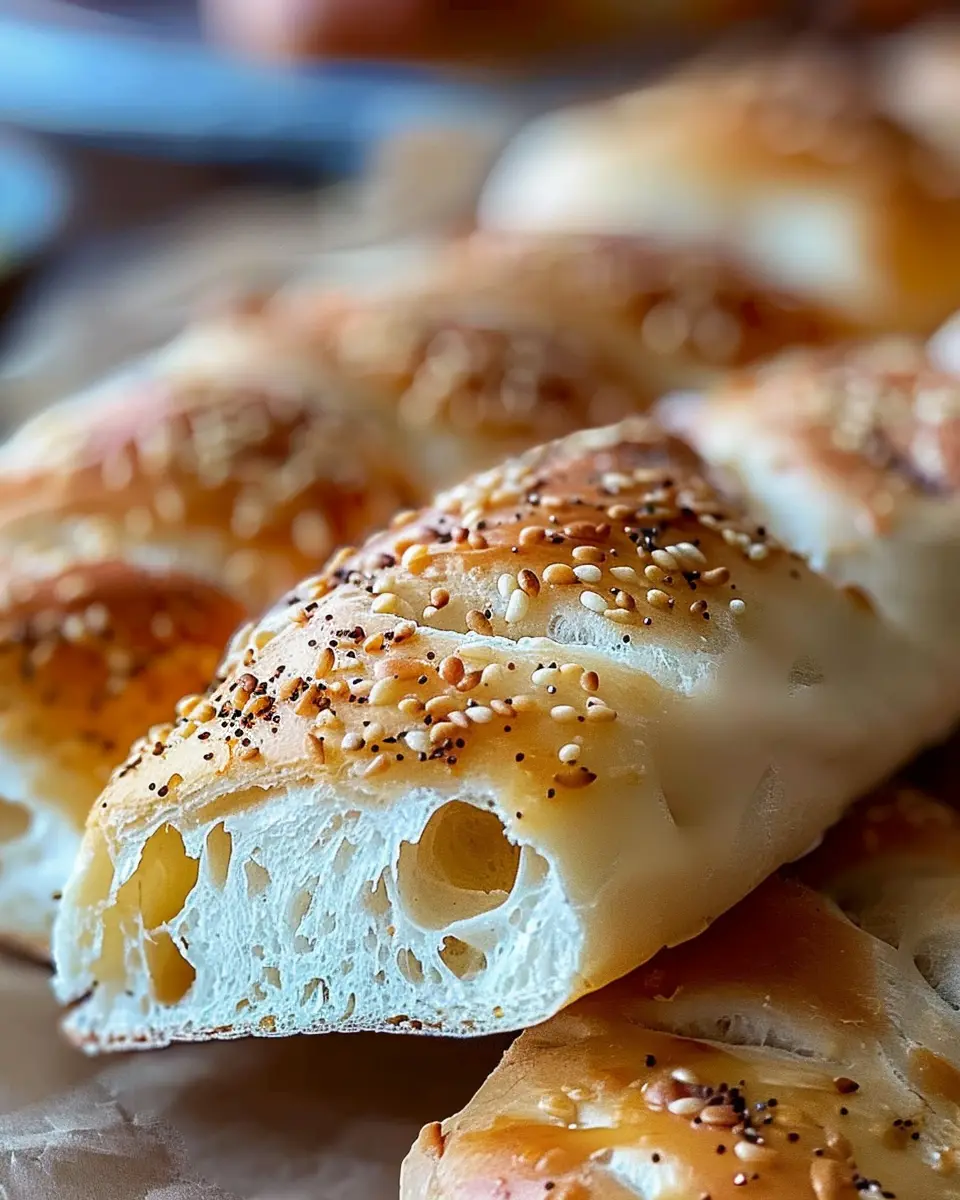
There’s something incredibly satisfying about making your own bread at home. The aroma that fills your kitchen as it bakes, the warm, pillowy texture, and the ability to customize ingredients to align with personal taste are just a few reasons why homemade bread has captured the hearts of many cooking enthusiasts. Rather than relying on store-bought versions, making no-oven Turkish bread allows you to explore new flavors and techniques in the comfort of your own kitchen. The best part? You don’t have to wait for hours as it mingles with warm air in an oven.
Did you know that freshly baked bread can be both a comforting staple and a way to impress friends at gatherings? Whether you’re planning a cozy dinner with loved ones or simply want to enjoy a quick snack, this easy-to-make bread guarantees satisfaction every time.
Why No-Oven Recipes Are a Game Changer
In today’s fast-paced world, convenience is king, and no-oven recipes are changing the way we approach cooking. Whether you’re tight on space, lacking a traditional oven, or just craving a quick baking experience, the no-oven method allows for flexibility without sacrificing flavor. Plus, trying out no-oven Turkish bread brings a piece of culture right to your table.
Here are some reasons why adopting no-oven recipes can elevate your culinary adventures:
- Time-Efficient: Without the need for preheating an oven, you can whip up this delightful bread in no time.
- Versatile: You can use a stovetop, skillet, or even a microwave. The options are endless!
- Experimentation Friendly: Feel free to experiment with different flavors, add herbs, or even mix in toppings without the worry of undercooking like you might face with traditional baking.
Additionally, the popularity of no-oven baking is backed by a recent surge in blogs and cooking shows celebrating these modern techniques. Have you checked out sites like Serious Eats or Bon Appétit for more inspiration? Why not dive into a new culinary adventure and see how easy it is to make your own Turkish bread without an oven?
Ingredients for No-Oven Turkish Bread
Essential ingredients for the bread
Creating delicious no-oven Turkish bread starts with simple yet flavorful ingredients. Here’s what you’ll need to gather:
- Flour: All-purpose flour works best, giving you the perfect texture.
- Water: It acts as a binder and ensures the dough has the right consistency.
- Yeast: Instant yeast is ideal for a fluffy rise without the need for lengthy proofing.
- Salt: A pinch enhances flavor and strengthens the dough.
- Sugar: Just a teaspoon helps the yeast activate and adds a slight sweetness to the bread.
These essentials combine beautifully to create a pillowy bread perfect for any meal!
Optional toppings to elevate your dish
While the bread is delightful as it is, consider these toppings to add extra flair:
- Sesame seeds: Sprinkle for a nutty crunch.
- Za’atar mix: A fragrant twist that transports your taste buds.
- Fresh herbs: Think rosemary or parsley for vibrant color and flavor.
- Grated cheese: Feta or mozzarella adds creaminess and pairs well with the dough.
Experimenting with different toppings can turn your no-oven Turkish bread into an outstanding dish perfect for sharing! Plus, if you’re looking for more inspiration, check out this resource on bread-making tips that offers a wealth of knowledge. Happy baking!
Step-by-step Preparation for No-Oven Turkish Bread
Making no-oven Turkish bread right at home is a wonderful culinary adventure that doesn’t require a fancy kitchen setup. Follow this step-by-step guide, and you’ll have fragrant, warm bread ready in no time. Let’s dive into the preparation!
Gather and prepare your ingredients
Before you start mixing, make sure you have everything at hand. Here’s what you’ll need:
- 2 cups all-purpose flour
- 1 teaspoon active dry yeast
- 1 teaspoon salt
- 1 tablespoon sugar
- 3/4 cup of warm water (not too hot!)
- 2 tablespoons olive oil
Having fresh ingredients is essential; they greatly affect the taste and texture of your bread. If you’re interested, check out this guide on choosing the best baking ingredients.
Mix the dry ingredients
In a large mixing bowl, combine your dry ingredients. Start by adding the flour, yeast, salt, and sugar. Use a whisk or a fork to mix them together thoroughly—this aerates the flour and ensures even distribution of the yeast and salt.
The mixing process is crucial; it not only blends the flavors but ensures that the yeast activates evenly throughout the dough. Did you know that proper blending can double your bread’s volume? Now that’s impressive!
Combine wet and dry ingredients
Next, create a well in the center of your dry mixture. Slowly pour in the warm water and olive oil. It’s best to mix with a fork until the dough starts to come together. When it’s too difficult to use the fork, switch to your hands and knead it a bit—this can be quite therapeutic!
Take your time here. The key is to ensure that no dry flour remains; every last particle should be incorporated into the dough.
Knead the dough to perfection
Once the dough forms a cohesive blob, it’s kneading time! Transfer it to a floured surface and begin folding and pushing it with your hands. Knead for about 5 to 10 minutes until it’s smooth and elastic.
Don’t rush it; the texture should be soft but not sticky. If you find it sticking to your hands, sprinkle a little more flour. A good rule of thumb is that perfect dough should feel slightly tacky but not clingy.
Let it rise — patience is key
Now comes the hardest part: waiting for the dough to rise. Place it in a lightly oiled bowl, cover it with a clean kitchen towel, and set it in a warm spot. Let it rest for about 1 hour or until it doubles in size.
While you’re waiting, use this time to prepare some toppings or accompaniments. Perhaps a garlic dip or turkey bacon sandwich fillings? Think of the endless possibilities as you let your dough rise!
Shape the bread into disks
Once your dough has risen beautifully, punch it down to release excess air. Turn it out onto a floured surface and divide it into smaller portions. Roll each piece into a ball and gently flatten it into disks, about 1/2 inch thick.
Using a rolling pin or your hands works perfectly here. Try to keep them uniform in size to ensure even cooking later on.
Cooking in the skillet
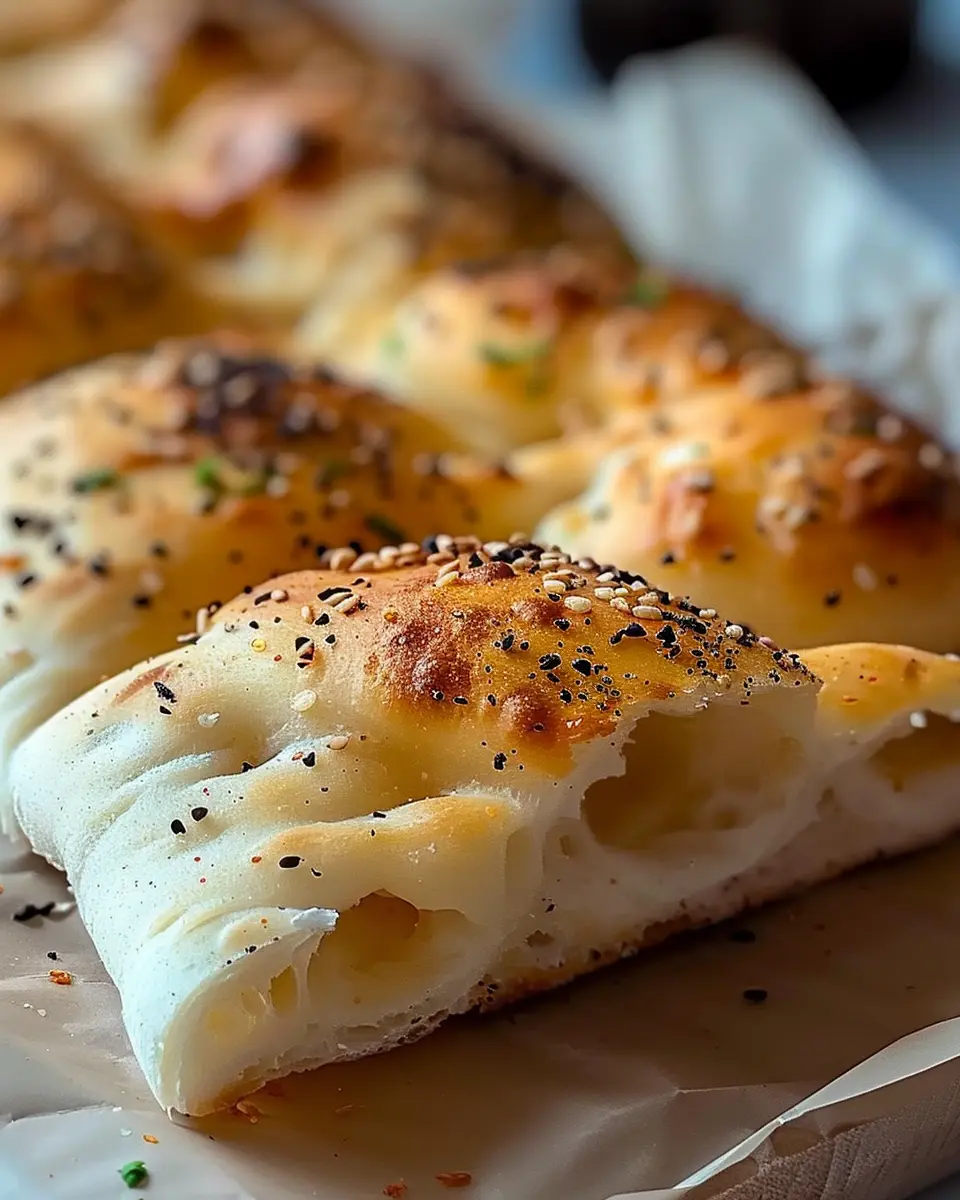
Heat a non-stick skillet over medium heat. Once hot, place the disks one at a time into the skillet, cooking for about 2–3 minutes on each side or until they puff up and develop a lovely golden color.
This technique gives your no-oven Turkish bread that beautiful, rustic crust without the need for an oven. It’s very satisfying to watch them transform right before your eyes!
Adding that delicious finishing touch
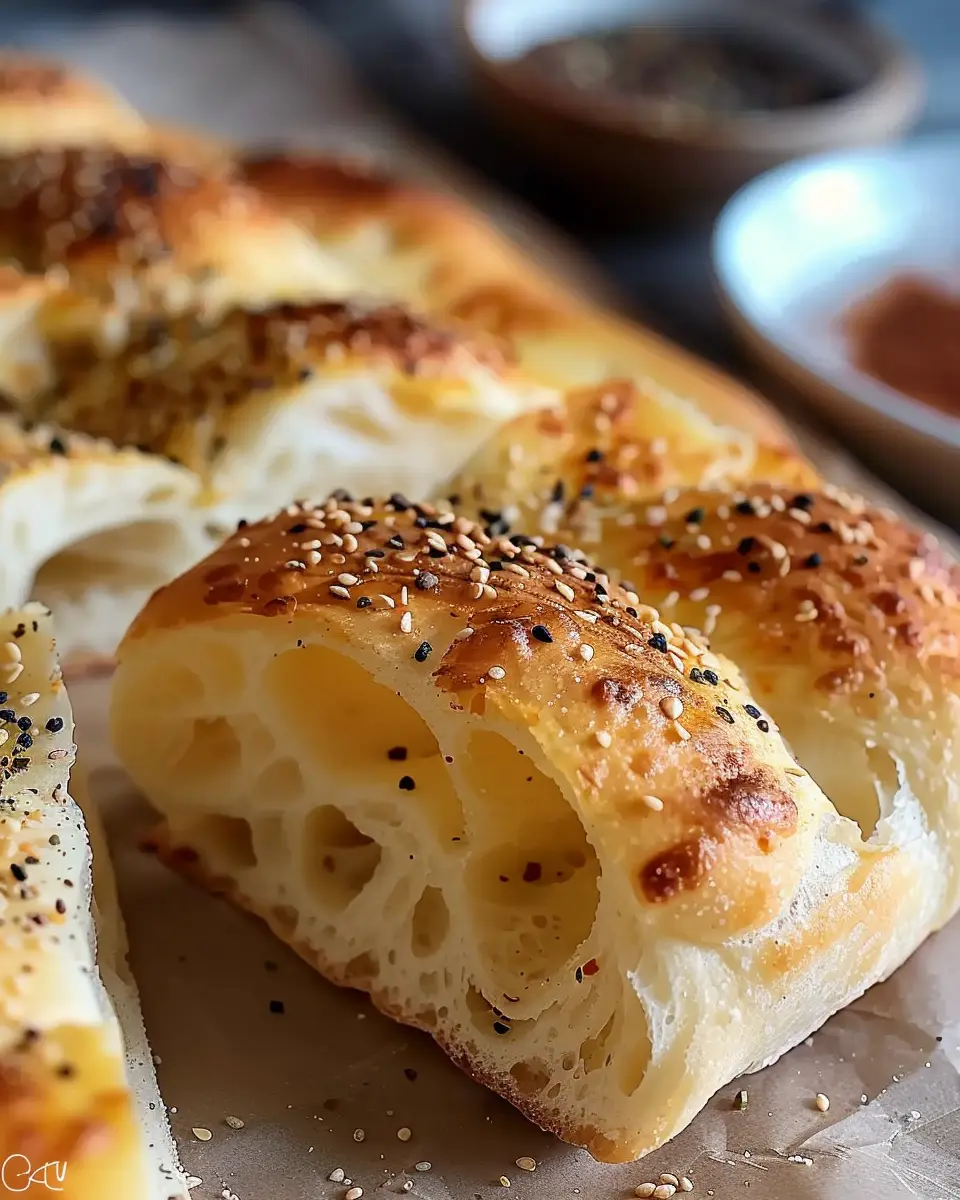
To elevate your no-oven Turkish bread, brush it with a little olive oil or melted butter immediately after cooking. You can also sprinkle sesame seeds or za’atar on top for added flavor.
These enhancements not only make your bread look appealing but also add that extra deliciousness that will make everyone beg for more.
Making no-oven Turkish bread is not just about baking; it’s about creating memories. So gather your friends or family and enjoy the process. Don’t forget to share your amazing creations online!
Variations of No-Oven Turkish Bread
Exploring the endless possibilities of no-oven Turkish bread can add a delightful twist to your meals! Let’s dive into some fun variations that cater to different tastes and preferences.
Herbal Variations for Fresh Flavors
For those who love a burst of freshness, consider adding a medley of herbs to your no-oven Turkish bread dough. Think about using:
- Rosemary and Thyme: These aromatic herbs pair wonderfully with olive oil, creating a fragrant loaf perfect for dipping in your favorite olive tapenade.
- Parsley and Cilantro: Chopped finely, these herbs can introduce a zesty flavor, making your bread a vibrant table centerpiece.
You can even sprinkle dried herbs such as oregano or za’atar on top before cooking for an added flavor kick. Interested in more ways to incorporate herbs? Check out this herb seasoning guide.
Stuffed Options for a Hearty Meal
If you’re looking for something more substantial, stuffing your no-oven Turkish bread can turn it into a delicious meal. Some popular filling ideas include:
- Cheese and Spinach: A classic combination that’s always satisfying. Feta or mozzarella can give you gooey, melted goodness.
- Turkey Bacon and Egg: Perfect for breakfast or brunch! The salty flavor of the turkey bacon complements the fluffy bread beautifully.
Experiment with your favorite ingredients to create the perfect stuffed delight!
Sweet Alternatives for a Delightful Treat
For a twist on the traditional, why not make a no-oven Turkish bread that’s a little sweeter? You could incorporate:
- Honey and Cinnamon: Brush your bread with honey and sprinkle cinnamon before cooking to inspire a warm, comforting flavor.
- Chocolate Chips and Nuts: Add these into the dough for a delightful twist that’s great for dessert or a special treat.
These sweet variations provide a wonderful way to enjoy your no-oven Turkish bread at any time of day!
Embrace the creativity that comes with each variation, and remember that the best part is making it uniquely yours!
Cooking Tips and Notes for No-Oven Turkish Bread
Tips for Achieving the Perfect Texture
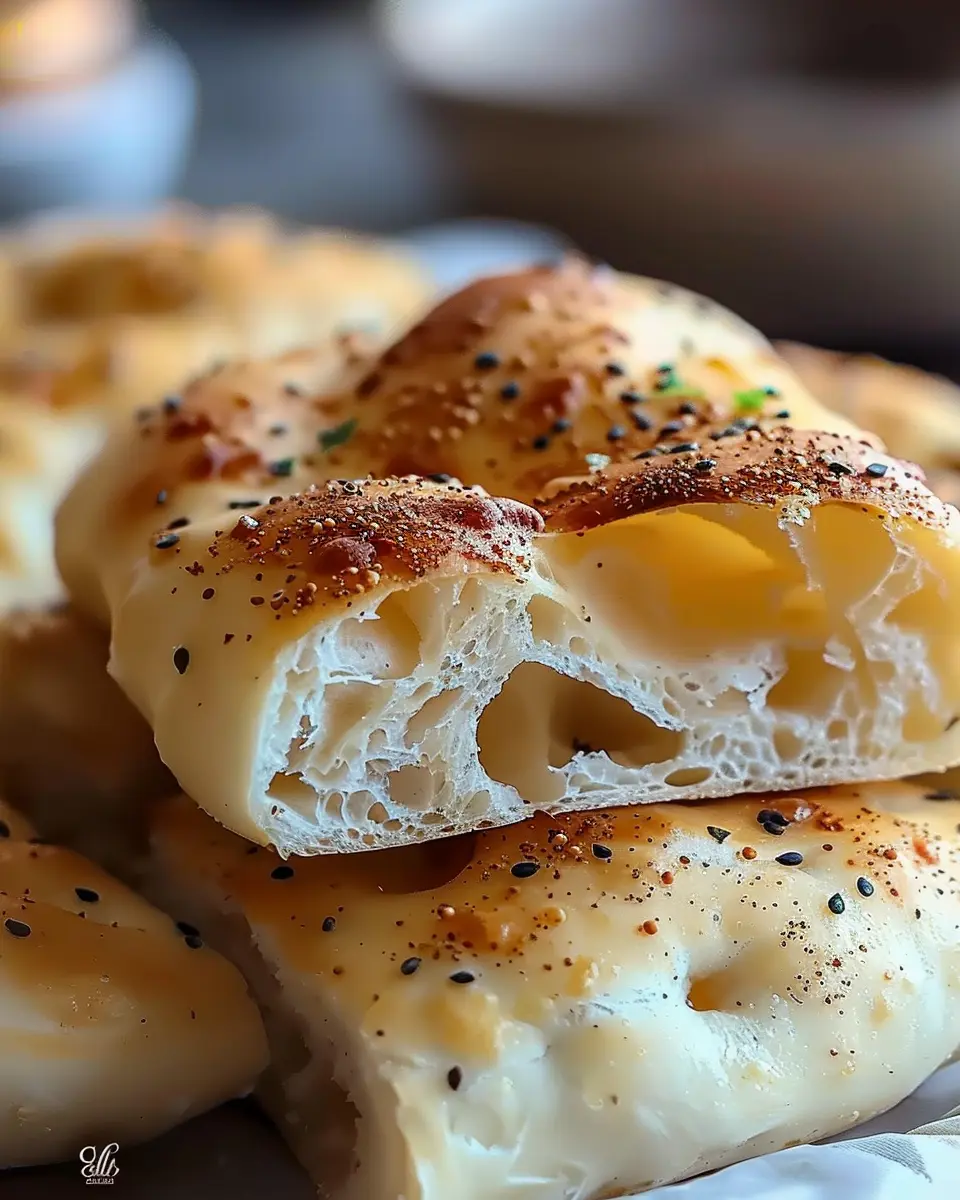
To make your no-oven Turkish bread fluffy and soft, focus on the dough’s hydration. Aim for a slightly sticky consistency; this helps create air pockets, resulting in a light, airy texture. Don’t rush the kneading process—spend at least 8-10 minutes ensuring the dough is well-developed. You can also sprinkle in a little more flour during rolling to prevent sticking, but avoid going overboard, as that can make your bread dense.
Storage Options and Reheating Methods
Once your no-oven Turkish bread is done, let it cool completely before storing it. Wrap it in plastic wrap or place it in an airtight container to maintain its moisture. For longer storage, consider freezing it; just make sure to slice it first for easy thawing. When you’re ready to enjoy it again, reheat on a skillet for a few minutes on each side, or pop it in the toaster to regain that delightful crunch.
For more expert tips on bread making, check out King Arthur Baking for additional resources.
Serving Suggestions for No-Oven Turkish Bread
Ideal Pairings for Dips and Spreads
This no-oven Turkish bread is the perfect canvas for a wide variety of dips and spreads. Try serving it warm with:
- Hummus: The creamy texture complements the robust flavor of the bread beautifully.
- Tzatziki: A refreshing yogurt-based dip that balances the doughy goodness.
- Baba Ganoush: This smoky eggplant spread brings a delightful twist to your serving.
Want to impress your guests? Create a mini dip platter with an assortment of colors and flavors, incorporating vibrant pesto or zesty salsa verde for an added kick.
Creative Uses for Wraps and Sandwiches
Beyond its delicious taste, no-oven Turkish bread is perfect for wraps and sandwiches. Here are some creative ideas:
- Turkey Bacon Wrap: Add some fresh greens, sliced tomatoes, and a drizzle of mustard for a savory snack.
- Chicken Ham Delight: Layer with cheese, arugula, and fresh herbs for a gourmet touch.
- Veggie Delight: Stuff with grilled vegetables and a dollop of feta for a vibrant vegetarian option.
By making your meal fun and interactive, you’ll be sure to impress. This versatile bread also pairs wonderfully with homemade fruit-infused lemonade or sparkling water to keep your gatherings fresh and lively!
For more ideas on serving bread and accompaniments, check out resources like BBC Good Food or EatingWell for inspiration.
Time Breakdown for No-Oven Turkish Bread
Preparation Time
The preparation time for this delightful no-oven Turkish bread is around 15 minutes. You’ll be mixing your ingredients, kneading the dough, and letting it rest, which provides a perfect moment to sip on a refreshing beverage or catch up on your favorite podcast.
Cooking Time
This is where the magic happens! Cooking your no-oven Turkish bread takes about 20 minutes. Whether you’re using a stovetop skillet or a grill, you’ll enjoy that enticing aroma filling your kitchen.
Total Time
In total, you’re looking at 35 minutes from start to finish. It’s a quick and satisfying way to elevate your meal—you can even serve it fresh alongside a side of olive oil for dipping. Interested in checking out some tips on achieving the perfect crust? Head over to The Kitchn for some great techniques!
Nutritional Facts for No-Oven Turkish Bread
Calories per serving
When enjoying a slice of no-oven Turkish bread, you can expect approximately 120 calories per serving. This makes it a delightful yet guilt-free addition to your meals.
Macronutrient breakdown
Understanding the macronutrient profile helps you appreciate your food choices. For each serving, you typically get:
- Carbohydrates: 25g
- Proteins: 4g
- Fats: 2g
This balance provides energy and can easily pair with various toppings, like hummus or grilled vegetables. For those who are health conscious, this bread indeed fits well into a balanced diet.
If you’re keen on optimizing your meals, consider checking out Nutrition.gov for additional insights on wholesome eating habits. It’s all about making delicious, yet nutritious choices that align with your lifestyle!
FAQs about No-Oven Turkish Bread
If you’re diving into the world of no-oven Turkish bread, you might have a few questions. That’s totally normal! Let’s chat about some common queries to ensure your baking experience is smooth and enjoyable.
Can I use whole wheat flour instead of all-purpose?
Absolutely! Whole wheat flour can be a nutritious alternative to all-purpose flour in your no-oven Turkish bread. Just note that it may change the texture slightly, making it denser. You might want to adjust the liquid in your recipe, as whole wheat flour absorbs more water. A great tip is to start with a 1:1 ratio and see how the dough feels—smooth and elastic is the goal.
How can I make it gluten-free?
If you’re looking to whip up a gluten-free version of no-oven Turkish bread, consider using a gluten-free flour blend. Many of these blends contain a mix of rice flour, almond flour, and tapioca starch, which can work wonders in your bread. Follow the package instructions for hydration, as gluten-free flours can vary significantly in absorbency. You could also check out this resource for tips on gluten-free baking.
What are the best dips to serve with Turkish bread?
When it comes to pairing your no-oven Turkish bread, the possibilities are endless! Here are a few crowd-pleasers:
- Hummus: This classic chickpea dip brings a creamy texture and a delightful flavor.
- Tzatziki: Cool and refreshing, this yogurt-based dip is a perfect complement.
- Muhammara: A spicy, nutty red pepper spread that adds a kick to your meal.
Feel free to mix and match! Dive into the world of flavors and enjoy your baking adventure!
Conclusion on No-Oven Turkish Bread
Recap of the Benefits of Homemade Bread
Homemade bread is not only a delightful way to elevate your meals but also a healthier choice. By making your own no-oven Turkish bread, you control the ingredients, ensuring minimal preservatives and no artificial additives. Plus, the smell of freshly baked bread filling your kitchen is an experience that can’t be beaten. It’s perfect for cozy dinners, casual gatherings, or even a quick breakfast paired with your favorite spreads.
Encouragement to Try the Recipe Today
I encourage you to try this no-oven Turkish bread recipe today! It’s simple, rewarding, and perfect for bakers of all skill levels. Imagine tearing into warm, fluffy bread that you made yourself. Don’t hesitate—your taste buds will thank you! For more tips on homemade bread, check out this article on the benefits of baking. Enjoy the process, and happy baking!
PrintNo-Oven Turkish Bread: Easy Homemade Delight for Everyone

Discover the easy way to make No-Oven Turkish Bread right at home with this delightful recipe, perfect for everyone.
- Prep Time: 15 minutes
- Cook Time: 15 minutes
- Total Time: 30 minutes
- Yield: 6 servings 1x
- Category: Bread
- Method: Stovetop
- Cuisine: Turkish
- Diet: Vegetarian
Ingredients
- 2 cups all-purpose flour
- 1 teaspoon salt
- 1 teaspoon sugar
- 1 tablespoon baking powder
- 1 cup yogurt
- 1 tablespoon olive oil
- water as needed for dough consistency
Instructions
- In a large bowl, combine the flour, salt, sugar, and baking powder.
- Add the yogurt and olive oil to the dry ingredients and mix well.
- Knead the dough until smooth, adding water as needed for consistency.
- Divide the dough into equal portions and shape them into flat rounds.
- Cook the rounds in a non-stick skillet over medium heat for about 2-3 minutes on each side or until golden brown.
Notes
- For additional flavor, consider adding herbs or spices to the dough.
- Serve warm with your favorite dips or spreads.
Nutrition
- Serving Size: 1 piece
- Calories: 150
- Sugar: 1g
- Sodium: 300mg
- Fat: 3g
- Saturated Fat: 0.5g
- Unsaturated Fat: 2g
- Trans Fat: 0g
- Carbohydrates: 30g
- Fiber: 1g
- Protein: 5g
- Cholesterol: 0mg
Keywords: No-Oven Turkish Bread, homemade bread, easy recipes