Introduction to Copycat Raising Cane’s Bread
If you’ve ever stepped into a Raising Cane’s, you know their famous Texas Toast is practically a star on the menu. Its buttery, garlicky goodness can elevate any meal, but have you considered turning your kitchen into a mini-Raising Cane’s? There’s something undeniably satisfying about making your own bread, and trust me—homemade bread is a game changer.
Why Homemade Bread is a Game Changer
Imagine biting into warm, fluffy bread fresh from the oven. Sounds delightful, right? Not only does homemade bread taste better, but it also allows you to control the ingredients. You can customize the flavors, add a personal twist, and avoid unwanted preservatives. Plus, there’s a real joy in kneading dough that store-bought bread simply can’t compete with. According to a study by the American Bakers Association, homemade bread is usually less expensive per loaf than its store-bought counterparts, providing both economic and culinary benefits.
When you whip up Raising Cane’s Bread at home, you don’t just recreate a favorite; you also engage your senses. The smell that wafts through your house while baking is enough to draw everyone in, making it a fantastic option for gatherings or cozy nights in. Pair it with juicy Chicken Ham, crispy Turkey Bacon, or even a fresh salad, and you’ve got a meal that feels elevated.
The Nutritional Advantage
Another perk is the nutritional element. By making your own Raising Cane’s Bread, you can opt for whole-grain flours or additional seeds and nuts, ramping up both fiber and protein content. According to the Whole Grains Council, incorporating whole grains can lead to numerous health benefits, such as improved digestion and better heart health. Want to explore some alternative ingredients? Check out this guide on healthy baking.
So, whether you’re prepping a fantastic meal or simply craving something deliciously comforting, making your own version of Raising Cane’s Bread is an experience you won’t regret. Now let’s dive into how to bring this mouthwatering creation to life in your own kitchen!
Ingredients for Copycat Raising Cane’s Bread
When it comes to recreating the beloved Raising Cane’s Bread, having the right ingredients is key. Let’s break down the essentials you’ll need for success, along with those mouthwatering accompaniments that make this recipe truly legendary.
Essential Ingredients for the Bread
For your Raising Cane’s Bread, gather the following items:
- All-purpose flour: Provides the perfect base.
- Yeast: Fresh yeast gives your bread that delightful rise.
- Sugar: Just a hint to balance flavors.
- Salt: Enhances the overall taste.
- Butter: Adds richness to the dough.
- Milk: Use whole milk for a fluffier texture.
- Egg: Helps bind the ingredients together for a wonderful crumb.
Ingredients for Garlic Butter
Nothing pairs better with bread than some homemade garlic butter! You’ll need:
- Unsalted butter: For spreading over your warm bread.
- Garlic: Freshly minced for that genuine flavor.
- Parsley: Adds a pop of freshness and color.
Ingredients for Raising Cane’s Sauce
And let’s not forget the sauce that elevates your bread experience!
- Mayonnaise: The base of the sauce.
- Ketchup: For a touch of sweetness.
- Worcestershire sauce: Adds depth of flavor.
- Garlic powder and black pepper: To spice things up.
With these ingredients, you’ll be well on your way to creating a Raising Cane’s Bread experience right at home! Remember: quality ingredients make all the difference. If you’re curious about bread-making techniques, check out resources like King Arthur Baking for tips and tricks. Happy baking!
Preparing Copycat Raising Cane’s Bread
When it comes to comfort food, few things can compare to the deliciously soft and buttery bread served at Raising Cane’s. However, you don’t have to hop in your car or order takeout to enjoy this delightful indulgence. Making your own copycat Raising Cane’s Bread at home can be a fun and satisfying project, and I’m here to guide you through the process! Roll up your sleeves, and let’s get started.
Gather Your Ingredients
Before we dive into the baking process, let’s ensure you have everything you need on hand. You’ll want to gather:
- 4 cups of all-purpose flour
- 3 tablespoons of granulated sugar
- 1 tablespoon of salt
- 2 teaspoons of instant yeast
- 1 ½ cups of warm water (approximately 110°F)
- 3 tablespoons of unsalted butter, softened
- 2 tablespoons of vegetable oil (for greasing the bowl)
Once you have your ingredients ready, you’re only a few steps away from homemade perfection. Take a moment to familiarize yourself with the ingredients; knowing them will help in understanding how they contribute to the final product.
Mixing the Dough
Now that you have everything gathered, it’s time to mix our Raising Cane’s Bread dough. In a large mixing bowl, combine the flour, sugar, salt, and instant yeast. Mix them together until evenly distributed. Gradually add in the warm water—this helps the yeast activate, contributing to the fluffy texture we all love!
Here’s a pro tip: if you stir the mixture with a wooden spoon or spatula until just combined, you will create a shaggy dough. Avoid overmixing at this stage; this will help ensure that your bread remains light and airy.
Kneading and Rising
With your dough mixed, it’s time to knead! Transfer the shaggy dough onto a lightly floured surface and knead for about 8–10 minutes. If you feel like your arms could use a workout, this is perfect for you! The dough should become smooth and elastic by the end of this process.
Once you’re satisfied with the dough’s consistency, form it into a ball, place it in a greased bowl, and cover it with a damp kitchen towel. Let it rise in a warm area until it doubles in size—this usually takes about 1 to 1.5 hours. Kneading and rising are crucial steps; they allow the gluten to develop, resulting in beautifully soft bread.
Shaping the Loaves
After the dough has risen beautifully, the best part of the process is shaping it! Lightly punch down the dough (this is oddly satisfying) to release the air. Divide the dough into two equal pieces.
Take each piece and shape them into small loaves. You can make them round or oval, depending on your preference. Place the shaped loaves on a baking sheet lined with parchment paper, making sure to leave enough space between them for further rising.
Baking to Perfection
After shaping, let your loaves rise again until they’re puffy, about 30 minutes. Preheat your oven to 350°F while you wait, which gives those flavors time to deepen and develop.
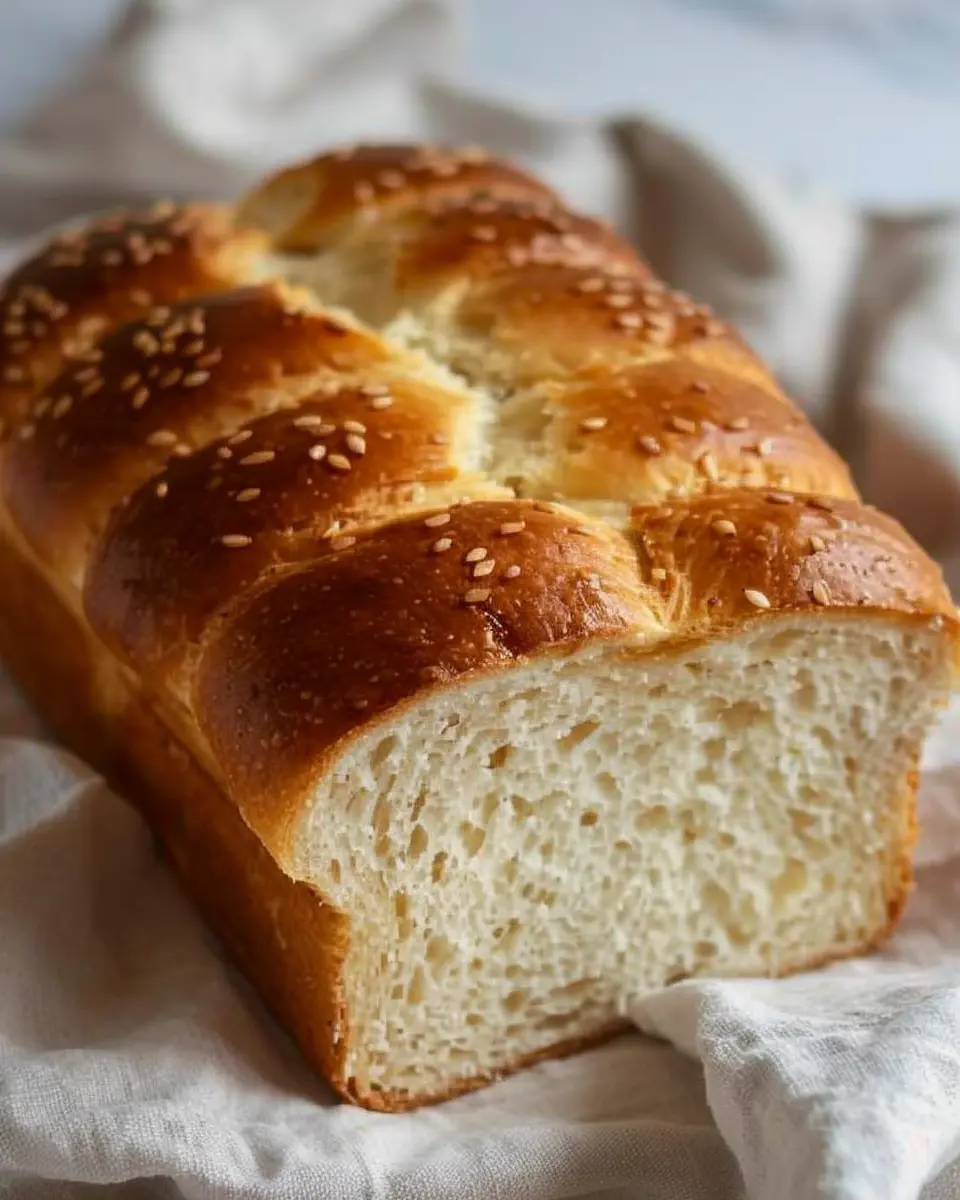
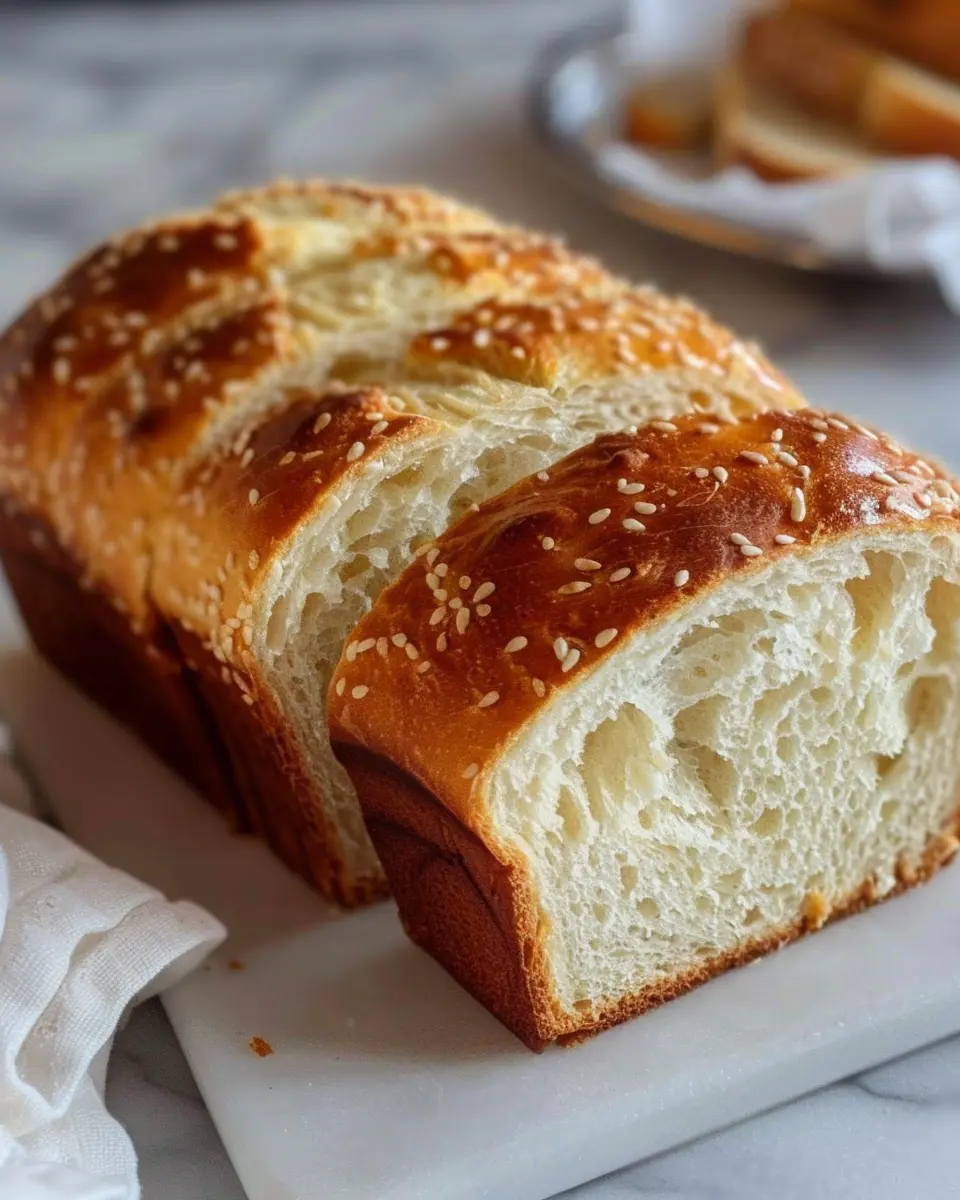
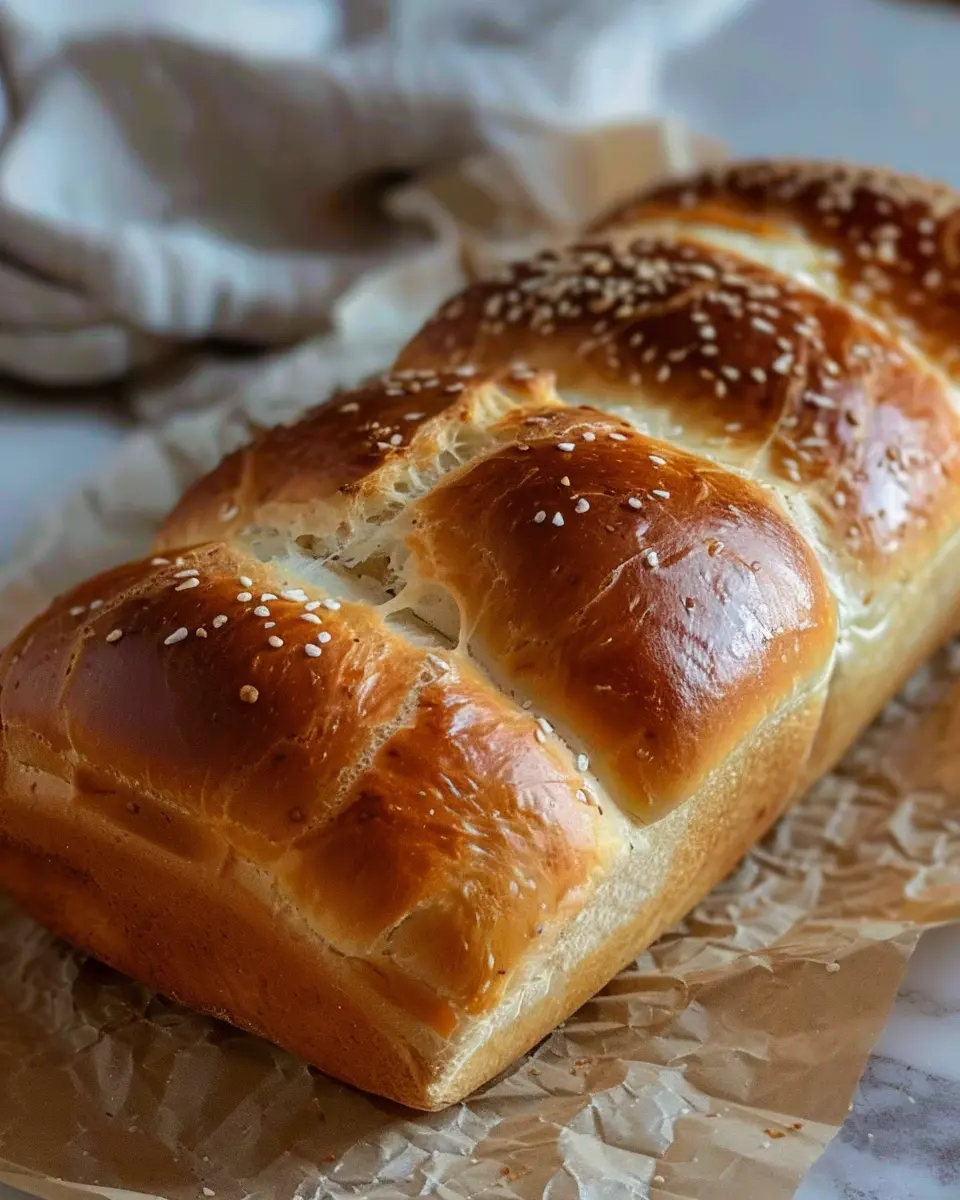
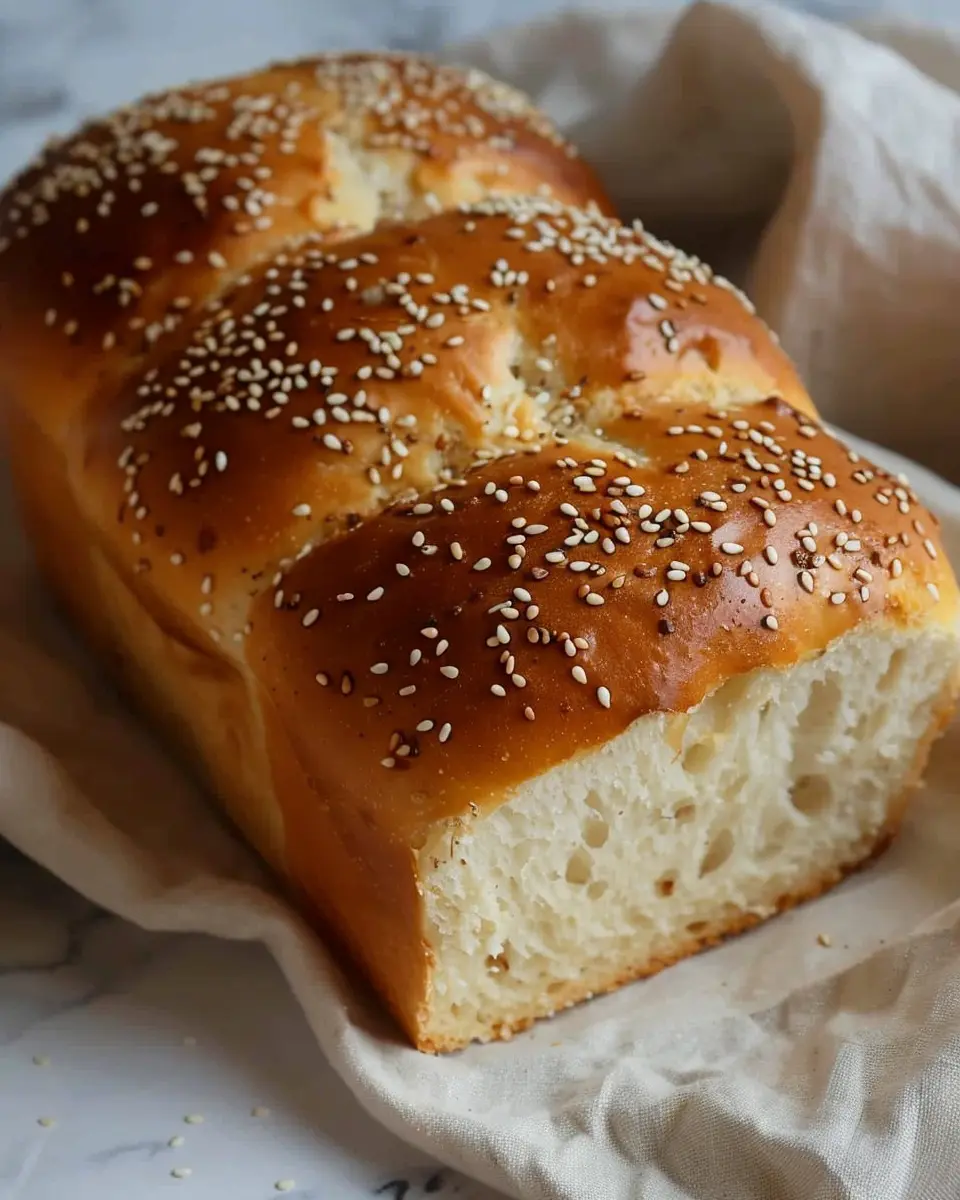
Once the loaves are ready, brush the tops with melted butter for that signature shiny finish. Bake in the preheated oven for about 25–30 minutes, or until they turn a beautiful golden brown. The smell wafting through your kitchen will be irresistible!
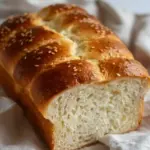
When ready, transfer the loaves to a wire rack to cool. Trust me, you won’t be able to resist taking a slice out of the oven. Enjoy your homemade Raising Cane’s Bread fresh out of the oven, or store it for later use. Just think of all the delicious meals you can pair it with!
By following these straightforward steps, you’ll have your very own copycat Raising Cane’s Bread that’s sure to impress everyone. Happy baking!
Variations on Copycat Raising Cane’s Bread
Raising Cane’s Bread is a delicious treat that can be easily customized to suit various tastes. Let’s dive into some fun variations that elevate this classic recipe!
Cheesy Garlic Toast Variation
If you love the idea of adding a little cheese and garlic to your Raising Cane’s Bread, this variation is made for you! To achieve that gooey, cheesy perfection, simply spread a mixture of softened butter, minced garlic, and your favorite cheese (mozzarella, cheddar, or a blend) over the unbaked bread dough.
- Tip: Sprinkle fresh parsley or even Italian seasoning on top to add extra flavor and visual appeal.
- Baking Time: Keep an eye on it while baking; you want that cheese melted and bubbly without over-browning the bread.
This cheesy delight pairs wonderfully with marinara dipping sauce, making it an ideal snack or appetizer for your next gathering!
Whole Wheat Version for a Healthier Twist
For those looking to make a healthier choice, consider a whole wheat version of Raising Cane’s Bread. It’s simple! Just substitute half or all of the all-purpose flour with whole wheat flour. Not only does this add a nuttier flavor, but it also boosts the fiber content significantly.
- Bonus: You can add a touch of honey or maple syrup for a hint of sweetness which balances out the earthiness of the whole wheat.
- Texture Alert: Expect a denser loaf, but it will still be delightful, especially when paired with dips or spreads of your choice.
By experimenting with these variations, you’ll discover that making Raising Cane’s Bread can be both versatile and fun! If you’re on the lookout for more culinary inspiration, check out this resource for creative ideas. Enjoy your baking adventure!
Cooking tips and notes for Copycat Raising Cane’s Bread
Common mistakes to avoid
When crafting your own Raising Cane’s Bread, it’s easy to run into a few common pitfalls. One major mistake is overmixing the dough; this can yield a denser texture instead of the fluffy goodness we aim for. Remember, just mix until the ingredients are combined. Additionally, don’t skip letting your dough rise adequately! The rise time is crucial for that perfect airy bite. Also, keep an eye on your baking time—every oven is different, so checking for golden-brown perfection is your best bet.
How to store leftover bread
If you’re lucky enough to have some Raising Cane’s Bread leftovers, storing them properly will enhance their shelf life. Place the cooled bread in an airtight container or wrap it tightly in plastic wrap. This helps keep moisture locked in and prevents it from becoming stale. For longer storage, consider freezing the bread! Just slice it beforehand; this way, you can grab a piece whenever the craving hits without having to defrost the whole loaf.
For more baking insights, check out King Arthur Baking for expert tips. Happy baking!
Serving suggestions for Copycat Raising Cane’s Bread
Perfect pairings with Raising Cane’s sauce
When you whip up a batch of Copycat Raising Cane’s Bread, the first thing you’ll want to do is dive into that iconic Raising Cane’s sauce. This delectable dipping sauce is perfect for slathering on warm slices of bread, creating an irresistible combination. Consider serving it alongside crispy chicken tenders for a true Cane’s experience.
Other delicious pairings include:
- Grilled Chicken Sandwiches: Use the bread as a base for a savory sandwich stuffed with grilled chicken, Turkey Bacon, and fresh veggies.
- Soup Sidekick: Slice the bread and use it to mop up hearty soups or chili; the flavors meld beautifully with rich, comforting dishes.
- Breakfast: Turn your bread into gourmet toast topped with avocado, a poached egg, or even Chicken Ham for brunch.
Creative uses for leftover bread
Leftover Raising Cane’s Bread? Don’t toss it! Here are some inventive ways to repurpose it:
- Bread Pudding: Transform extra slices into a decadent bread pudding—a sweet treat that’s perfect for dessert.
- Croutons: Cube the bread, toss it with some olive oil, and seasonings, then bake for homemade croutons to elevate your salads.
- Stuffing: Combine with sautéed vegetables and seasonings for a fluffy stuffing at your next dinner gathering.
For more creative ideas, check out these recipes on Food Network for fun twists using leftover bread.
With these ideas in mind, you can savor your Copycat Raising Cane’s Bread long after the initial bake—turning each bite into a delightful experience!
Time Breakdown for Copycat Raising Cane’s Bread
Creating delicious Raising Cane’s Bread in your kitchen is a rewarding experience, and understanding the time commitment can help you plan your baking journey more effectively. Let’s break down the time involved:
Preparation Time
You’ll need about 15 to 20 minutes to gather your ingredients and mix your dough. This is the stage where the magic begins, so be sure to follow the recipe closely and enjoy the process.
Rising Time
Plan for about 1 to 1.5 hours for the dough to rise. This is crucial, as it allows the bread to develop its flavor and texture. Pro tip: Let it rise in a warm, draft-free area for the best results.
Baking Time
Once your dough has risen, it takes about 25 to 30 minutes to bake in the oven. Keep an eye on it to achieve that perfect golden-brown crust!
Total Time
In total, you’re looking at around 2 to 2.5 hours from start to finish—well worth the wait for homemade Raising Cane’s Bread! It’s perfect for sandwiches or as a side to any meal.
If you’d like to enhance your bread-making skills further, check out resources like King Arthur Baking for expert tips and community support!
Nutritional Facts for Copycat Raising Cane’s Bread
When you’re craving that tasty flavor of Raising Cane’s Bread, it’s always helpful to know exactly what you’re indulging in. Let’s break down the essential nutritional facts so you can savor every bite with confidence.
Calories per slice
Depending on the recipe and portion size, each slice of this delightful bread typically contains around 200-250 calories. It’s a filling option that pairs perfectly with your favorite dipping sauces.
Carbohydrates
You can expect approximately 35-40 grams of carbohydrates per slice. The fluffy texture comes from those carbs, giving you the energy boost you need to get through your busy day.
Protein content
With about 5-7 grams of protein per slice, Raising Cane’s Bread adds a little extra staying power to your meal. Whether enjoyed on its own or as a side, this bread helps keep you fueled throughout your day.
For more insights on nutritional values, the U.S. Department of Agriculture offers a comprehensive food database that can provide additional details on ingredients and their nutritional content. Enjoy your baking!
FAQs about Copycat Raising Cane’s Bread
Can I freeze the bread for later?
Absolutely! Freezing your Raising Cane’s Bread is a great way to preserve its freshness. To do this, let the bread cool completely, then wrap each loaf tightly in plastic wrap or aluminum foil. Place the wrapped loaves in a zip-top freezer bag, squeezing out as much air as possible before sealing. When you’re ready to enjoy it, simply thaw it at room temperature or pop it in the oven for a quick reheat. You’ll love how well it retains its texture and flavor!
What’s the best way to toast it?
Toasting Raising Cane’s Bread to perfection is key for that delightful crunch. Preheat your oven to 350°F (175°C). Place the slices directly on the oven rack or a baking sheet for about 5–10 minutes, watching closely until they’re golden brown and crispy. Alternatively, you can use a toaster or a skillet with a little butter to enhance that rich flavor. It’s an easy way to elevate your meal or snack!
Can I make this without a stand mixer?
Definitely! While a stand mixer makes the process easier, you can make Raising Cane’s Bread by hand. Simply combine your ingredients in a large mixing bowl and knead the dough on a floured surface for about 10 minutes, or until it’s smooth and elastic. This hands-on approach can be quite satisfying, letting you enjoy the therapeutic process of baking!
For more tips on baking bread and the science behind it, check out resources from King Arthur Baking and America’s Test Kitchen. Happy baking!
Conclusion on Copycat Raising Cane’s Bread
Recap of the Joy of Homemade Bread
Making Raising Cane’s Bread at home is more than just a recipe; it’s a delightful journey. The aroma of freshly baked bread fills your kitchen, wrapping you in warmth and comfort. There’s something so rewarding about measuring, mixing, and kneading your ingredients into something delicious.
With each buttery slice, you’re not just enjoying a tasty treat but also creating memories with family and friends. Whether it’s for a cozy dinner or a weekend brunch, this bread brings a smile to every face around the table. So roll up your sleeves, embrace the process, and create your own bread masterpiece! For more insights and tips on homemade bread, check out King Arthur Baking.
PrintRaising Cane’s Bread: The Best Homemade Recipe for Comfort Food
Learn how to make the perfect Raising Cane’s Bread at home with this easy recipe that guarantees comfort food for everyone.
- Prep Time: 10 minutes
- Cook Time: 30 minutes
- Total Time: 1 hour 40 minutes
- Yield: 1 loaf 1x
- Category: Bread
- Method: Baking
- Cuisine: American
- Diet: Vegetarian
Ingredients
- 2 cups all-purpose flour
- 1 tablespoon sugar
- 1 teaspoon salt
- 1 tablespoon active dry yeast
- ¾ cup warm water
- 2 tablespoons melted butter
Instructions
- In a bowl, combine warm water and yeast; let it sit for 5 minutes.
- In a separate bowl, mix flour, sugar, and salt.
- Add the yeast mixture and melted butter to the dry ingredients; knead until smooth.
- Place the dough in a greased bowl, cover, and let it rise for 1 hour.
- Preheat the oven to 375°F (190°C).
- Shape the dough into a loaf and place it in a greased pan; let it rise for another 30 minutes.
- Bake for 25-30 minutes until golden brown.
Notes
- For a richer flavor, use milk instead of water.
- Let the bread cool completely before slicing for the best texture.
Nutrition
- Serving Size: 1 slice
- Calories: 150
- Sugar: 1g
- Sodium: 200mg
- Fat: 3g
- Saturated Fat: 1g
- Unsaturated Fat: 2g
- Trans Fat: 0g
- Carbohydrates: 28g
- Fiber: 1g
- Protein: 4g
- Cholesterol: 5mg
Keywords: Raising Cane’s Bread, homemade bread, comfort food